")

It seems like it’s been a while since I’ve done any planner or organizational posts, but though I have fallen behind, my goal this year is to step up my game and get with it. I can’t believe that 2015 is already here (I know we established this in another post) and I have finally moved into my Large Kikki K Lilac & Gold Time Planner. Let’s be honest here for a second… we all know I had my eyes on this thing… how could I not? It’s purple… and gold and a little bit of happiness all wrapped into one planner. For now, this shall be labeled my unicorn! So let’s take a look at my 2015 planner set up.
Looking for a walk-through version? Check out my video embedded below or click here to watch it directly on YouTube.

Okay – time to get serious! Last year I ditched my ringed planners to venture into the coil planner craze. I loved my Keeping It Together (KIT) planner and highly suggest it to anyone who is interested in something like the Erin Condren (which I suggest too), I wanted something with a little more room which KIT offered. But, this old school planner girl missed her ringed planners and so I found myself moving back into one again for 2015. If you are used to a Filofax or any of the other planner brands, this particular planner from Kikki K is a bit more on the bulkier side than those, due to the padded feel of the planner. But, I’m not gonna lie, I LOVE it.
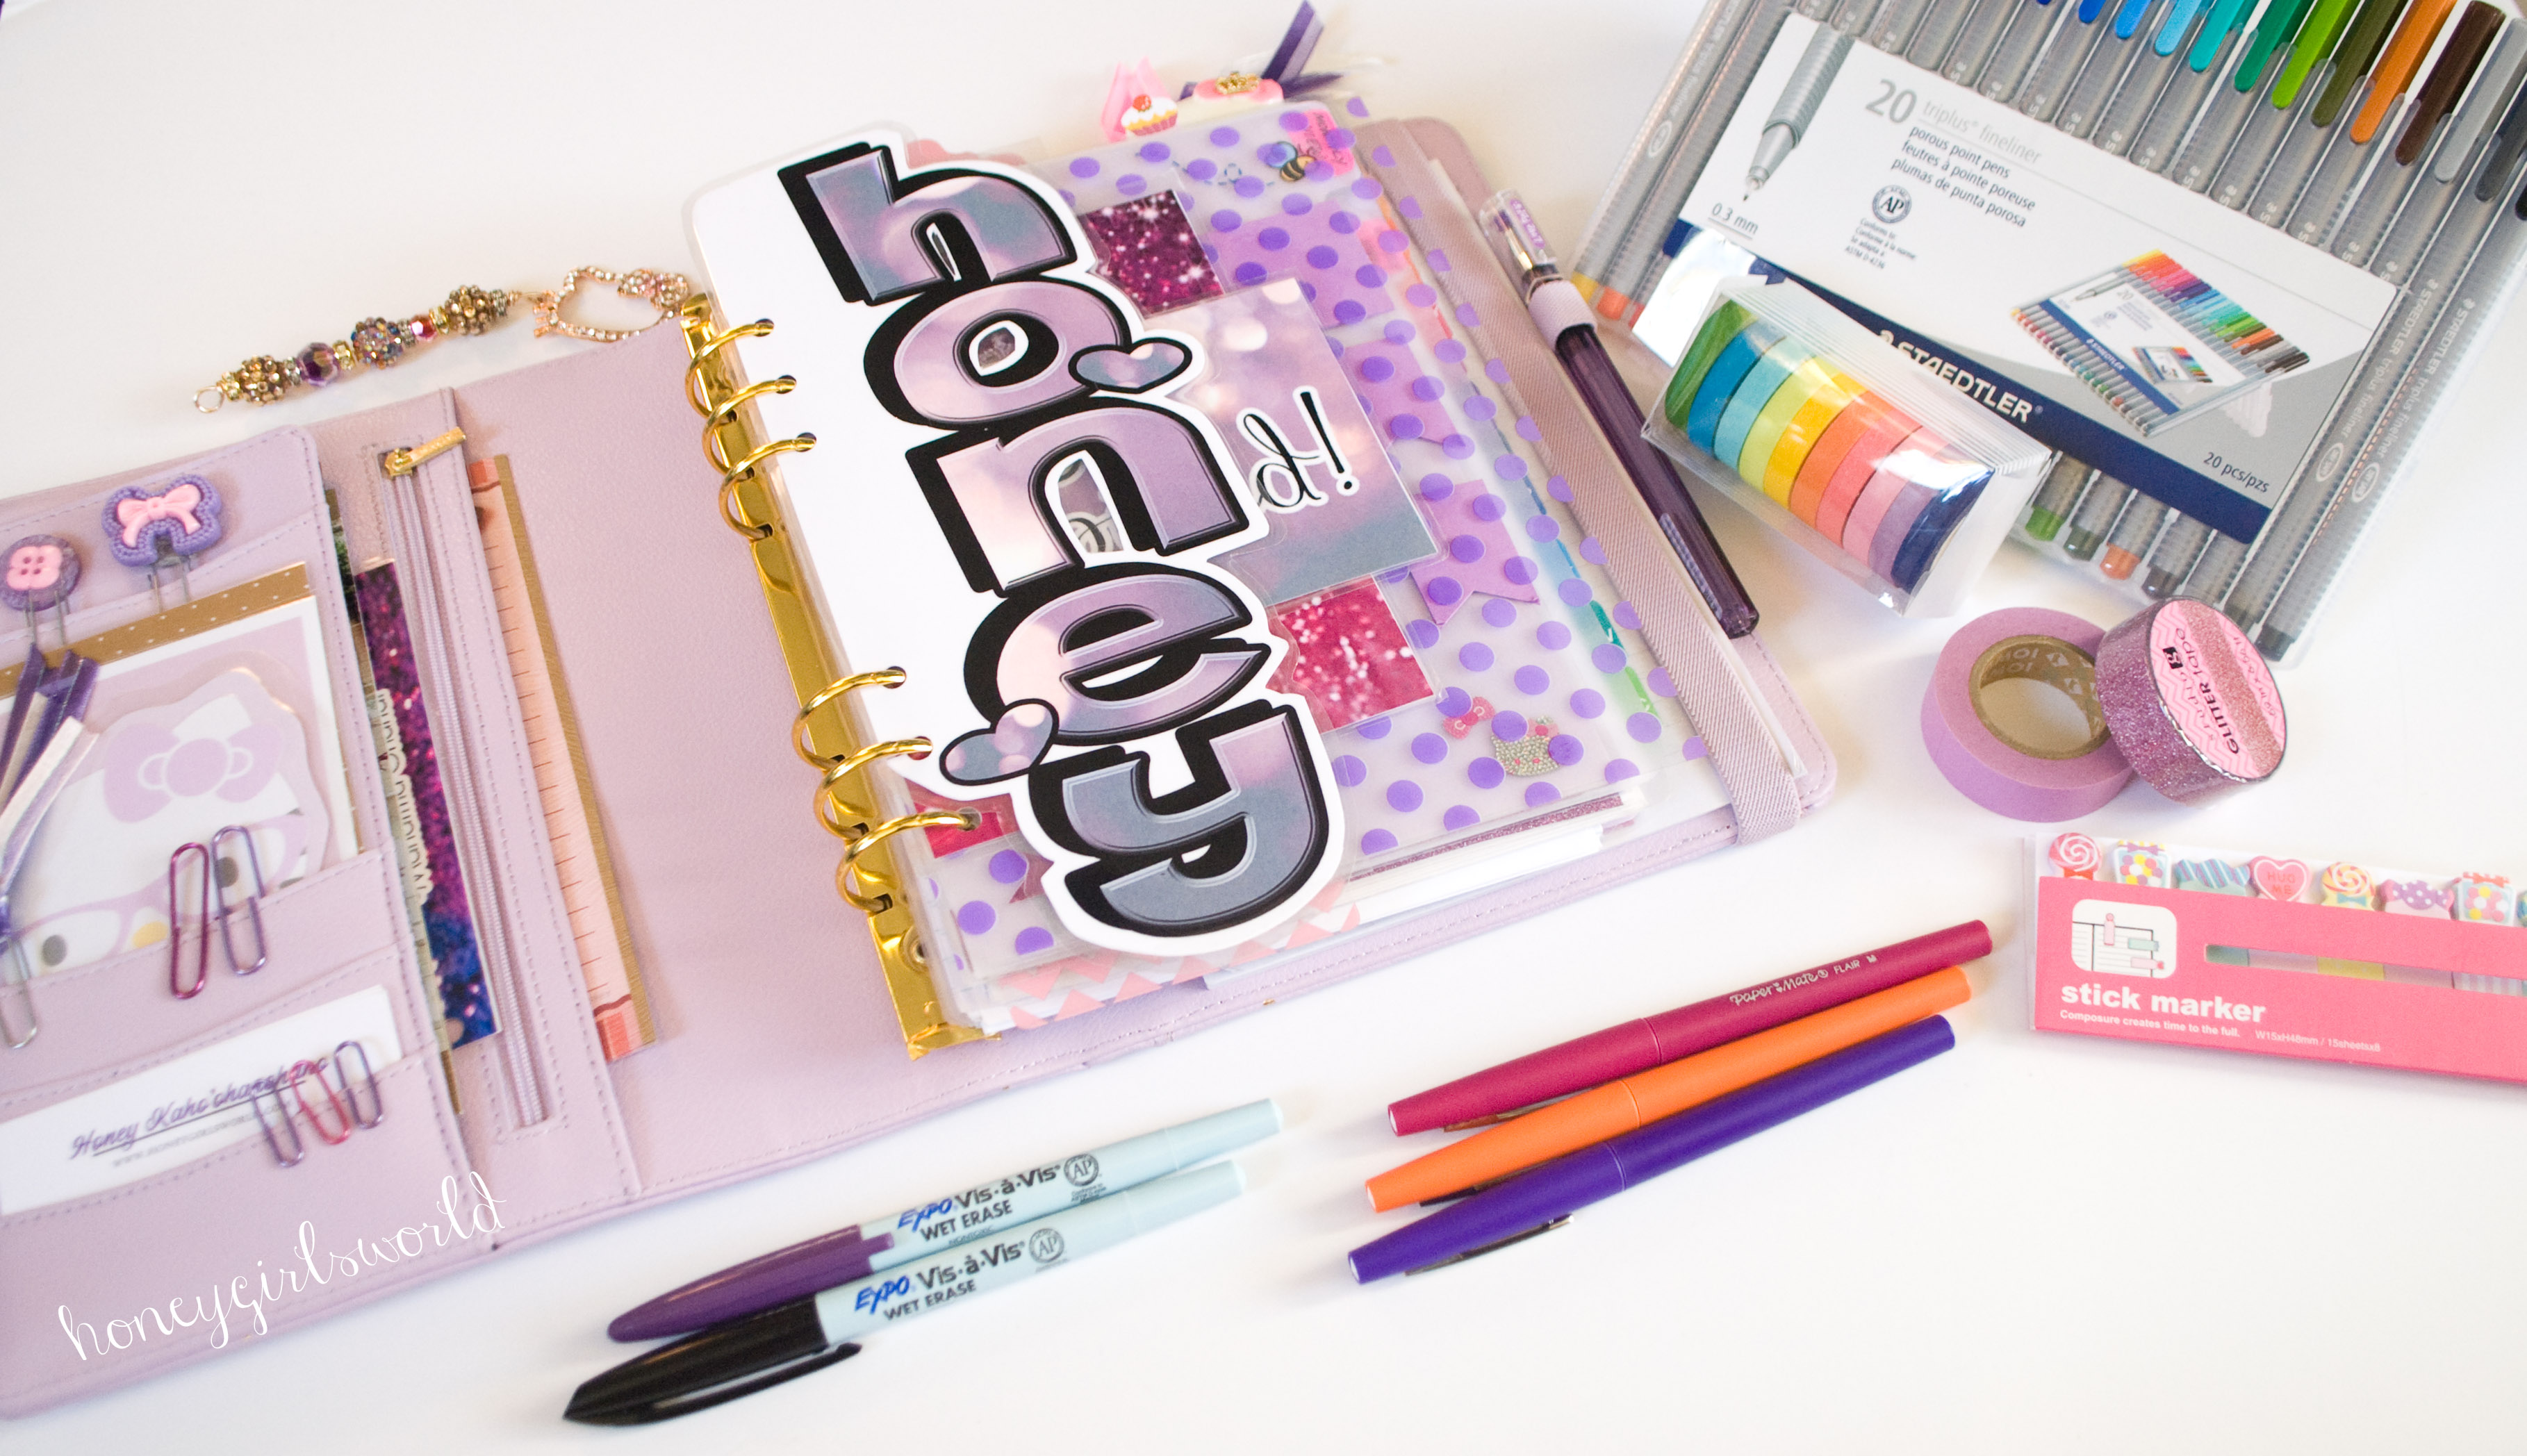
The inner cover of the planner has four pockets along with a zippered pocket and a secretarial pocket to store all your organizing necessities. I find these useful for holding on to business cards, post-its or page flags, photos and other things I want to keep on hand. The planner also came with a full set of dividers, 2015 inserts and even a note pad in the back. I have customized mine to fit my needs so I won’t get into too much detail. In comparison to a Filofax, Kikki K’s large Time Planner would be an A5 equivalent, though the Kikki K is a bit larger in size. This particular planner comes with an elastic closure which I actually do like. This Time Planner is made of all leather, which I love and when originally released, it retailed for $79.95.
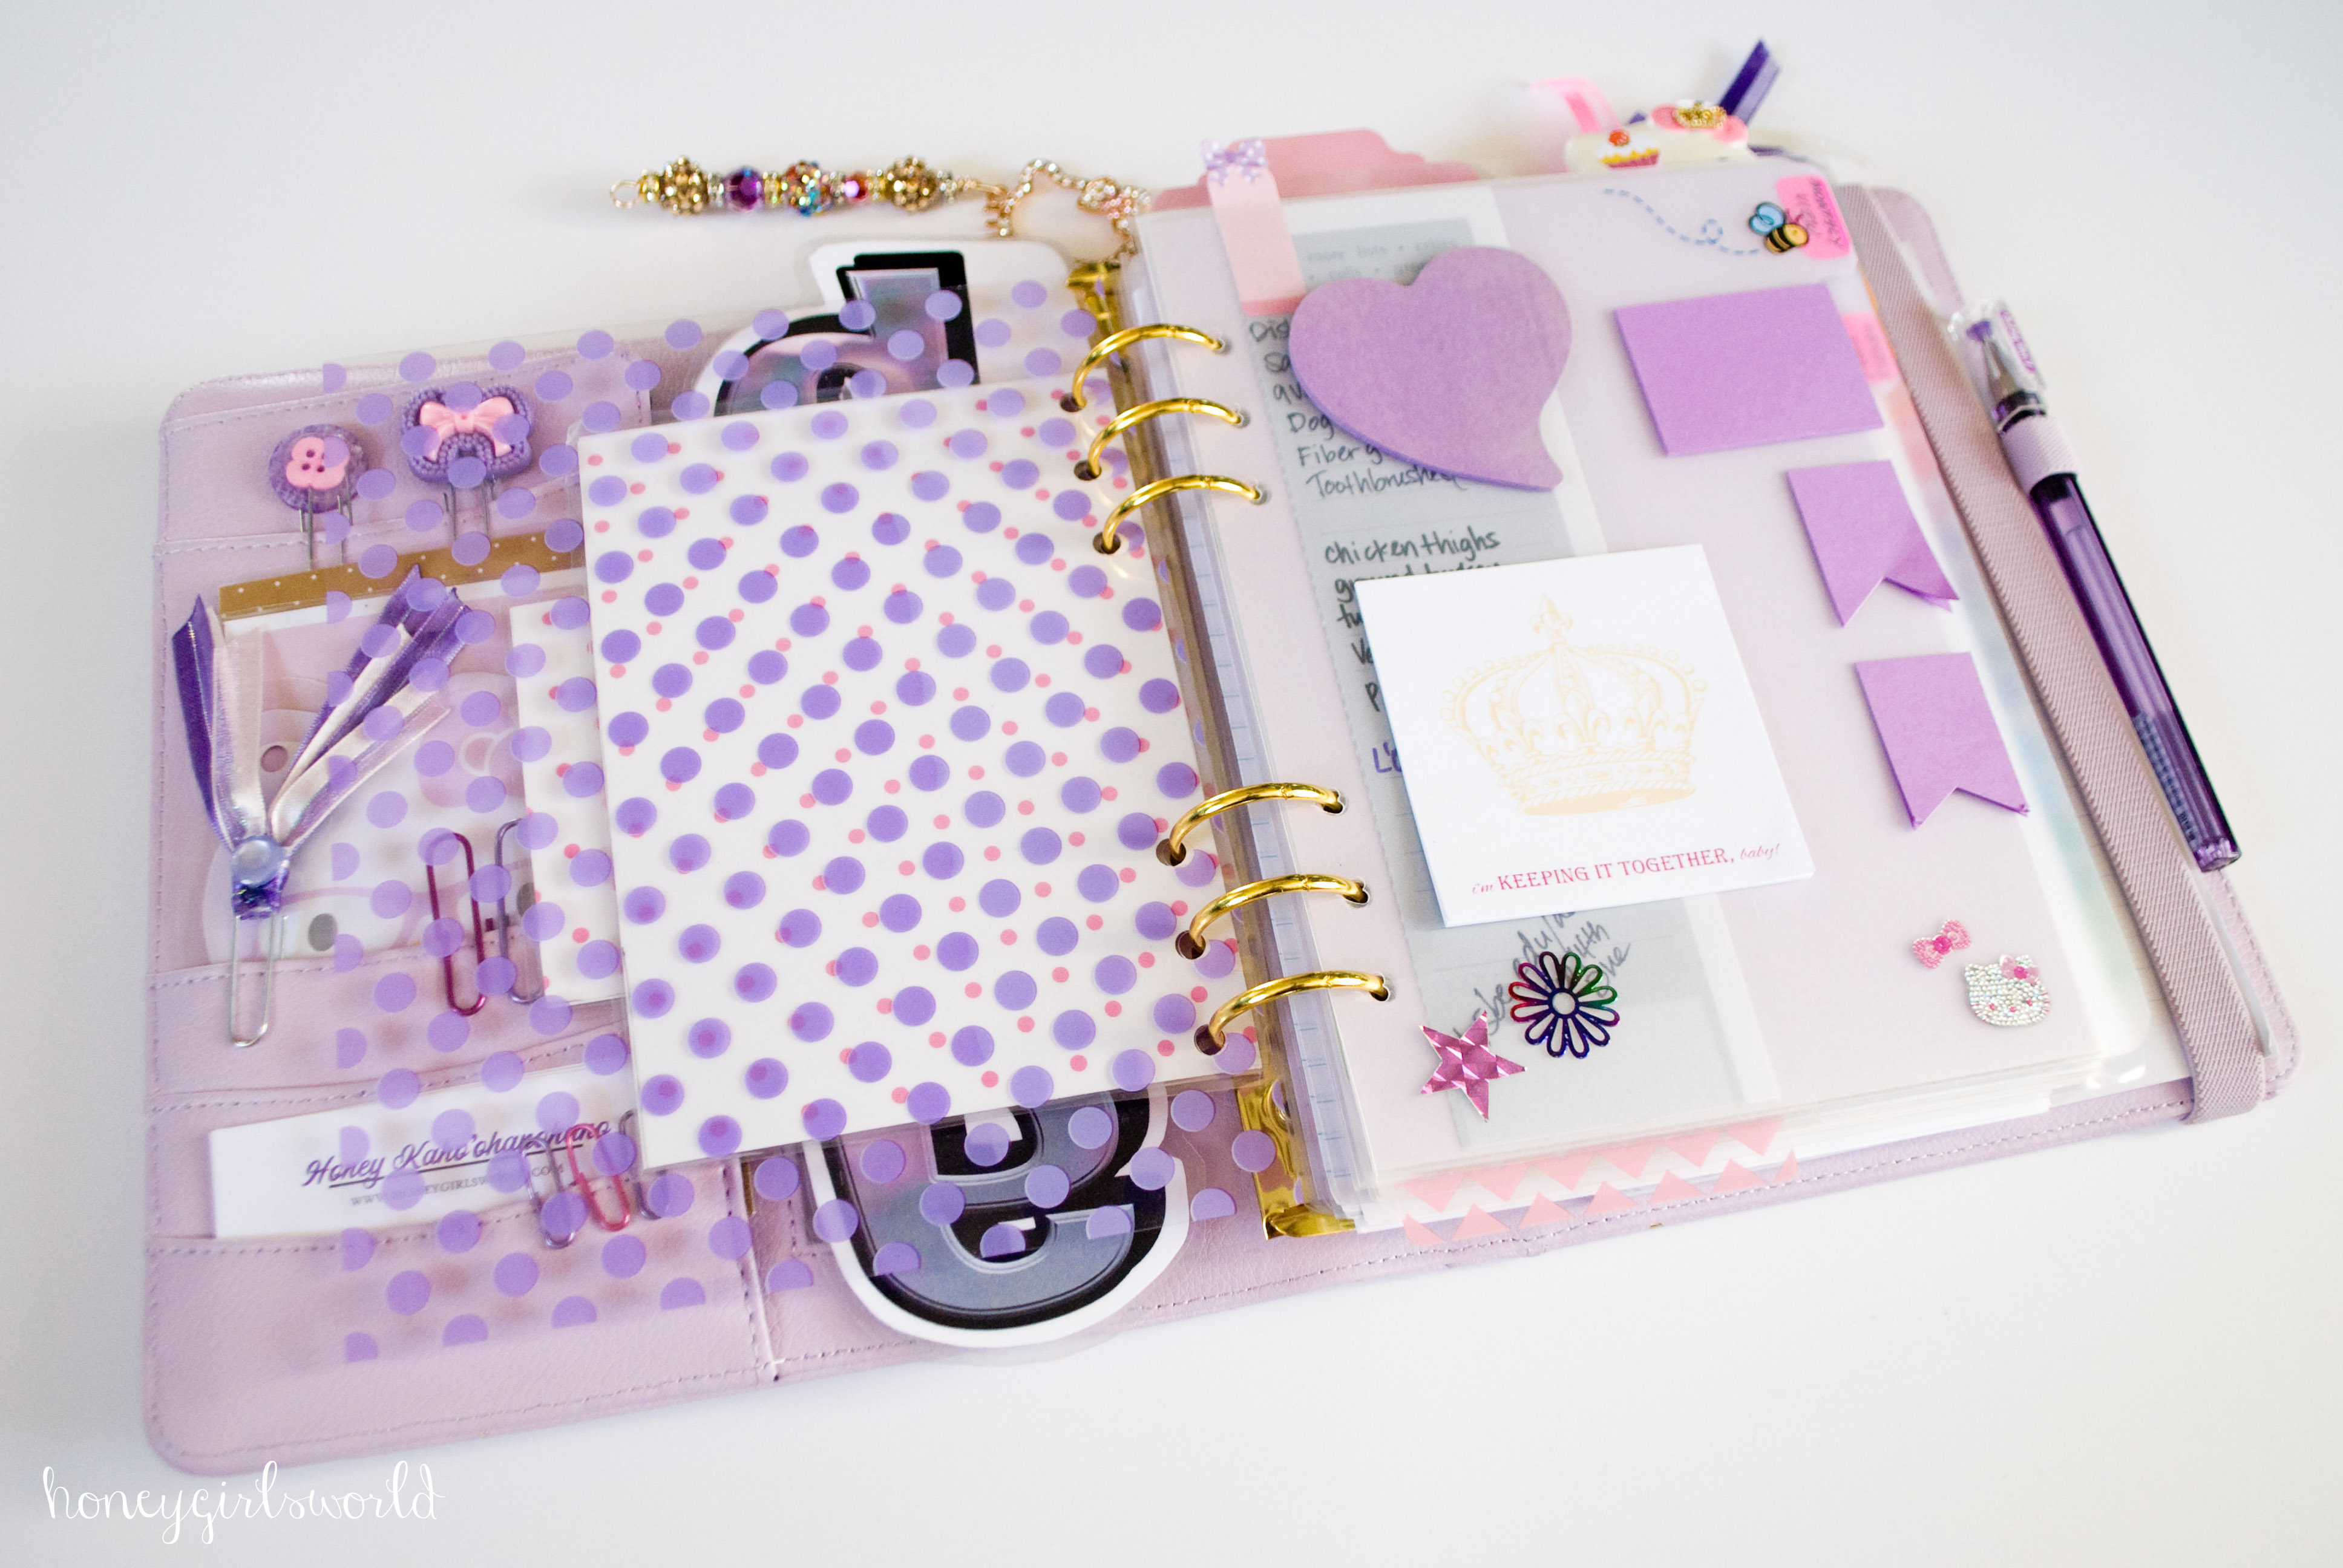
Now onto the inserts and the inner workings of my planner. Like any planner addict, I have a bunch of fun and inspiring things in the front portion of my planner, from quotes, a dashboard and even stickers and happy colorful things. Since this planner does come with Dividers (they were a light muted pink tone), I would have used those, but opted for ones I made myself out of card stock since I could personalize it the way I wanted. I love ringed planners for this purpose, customizing to your hearts content (which is a crafter’s dream) is what I enjoy. I create my own dashboards, fly leafs and fun items to help add an ambiance of happiness to my “to do” which creates a kind of Zen feel. Some people may like, others may not… but it’s fun nonetheless.
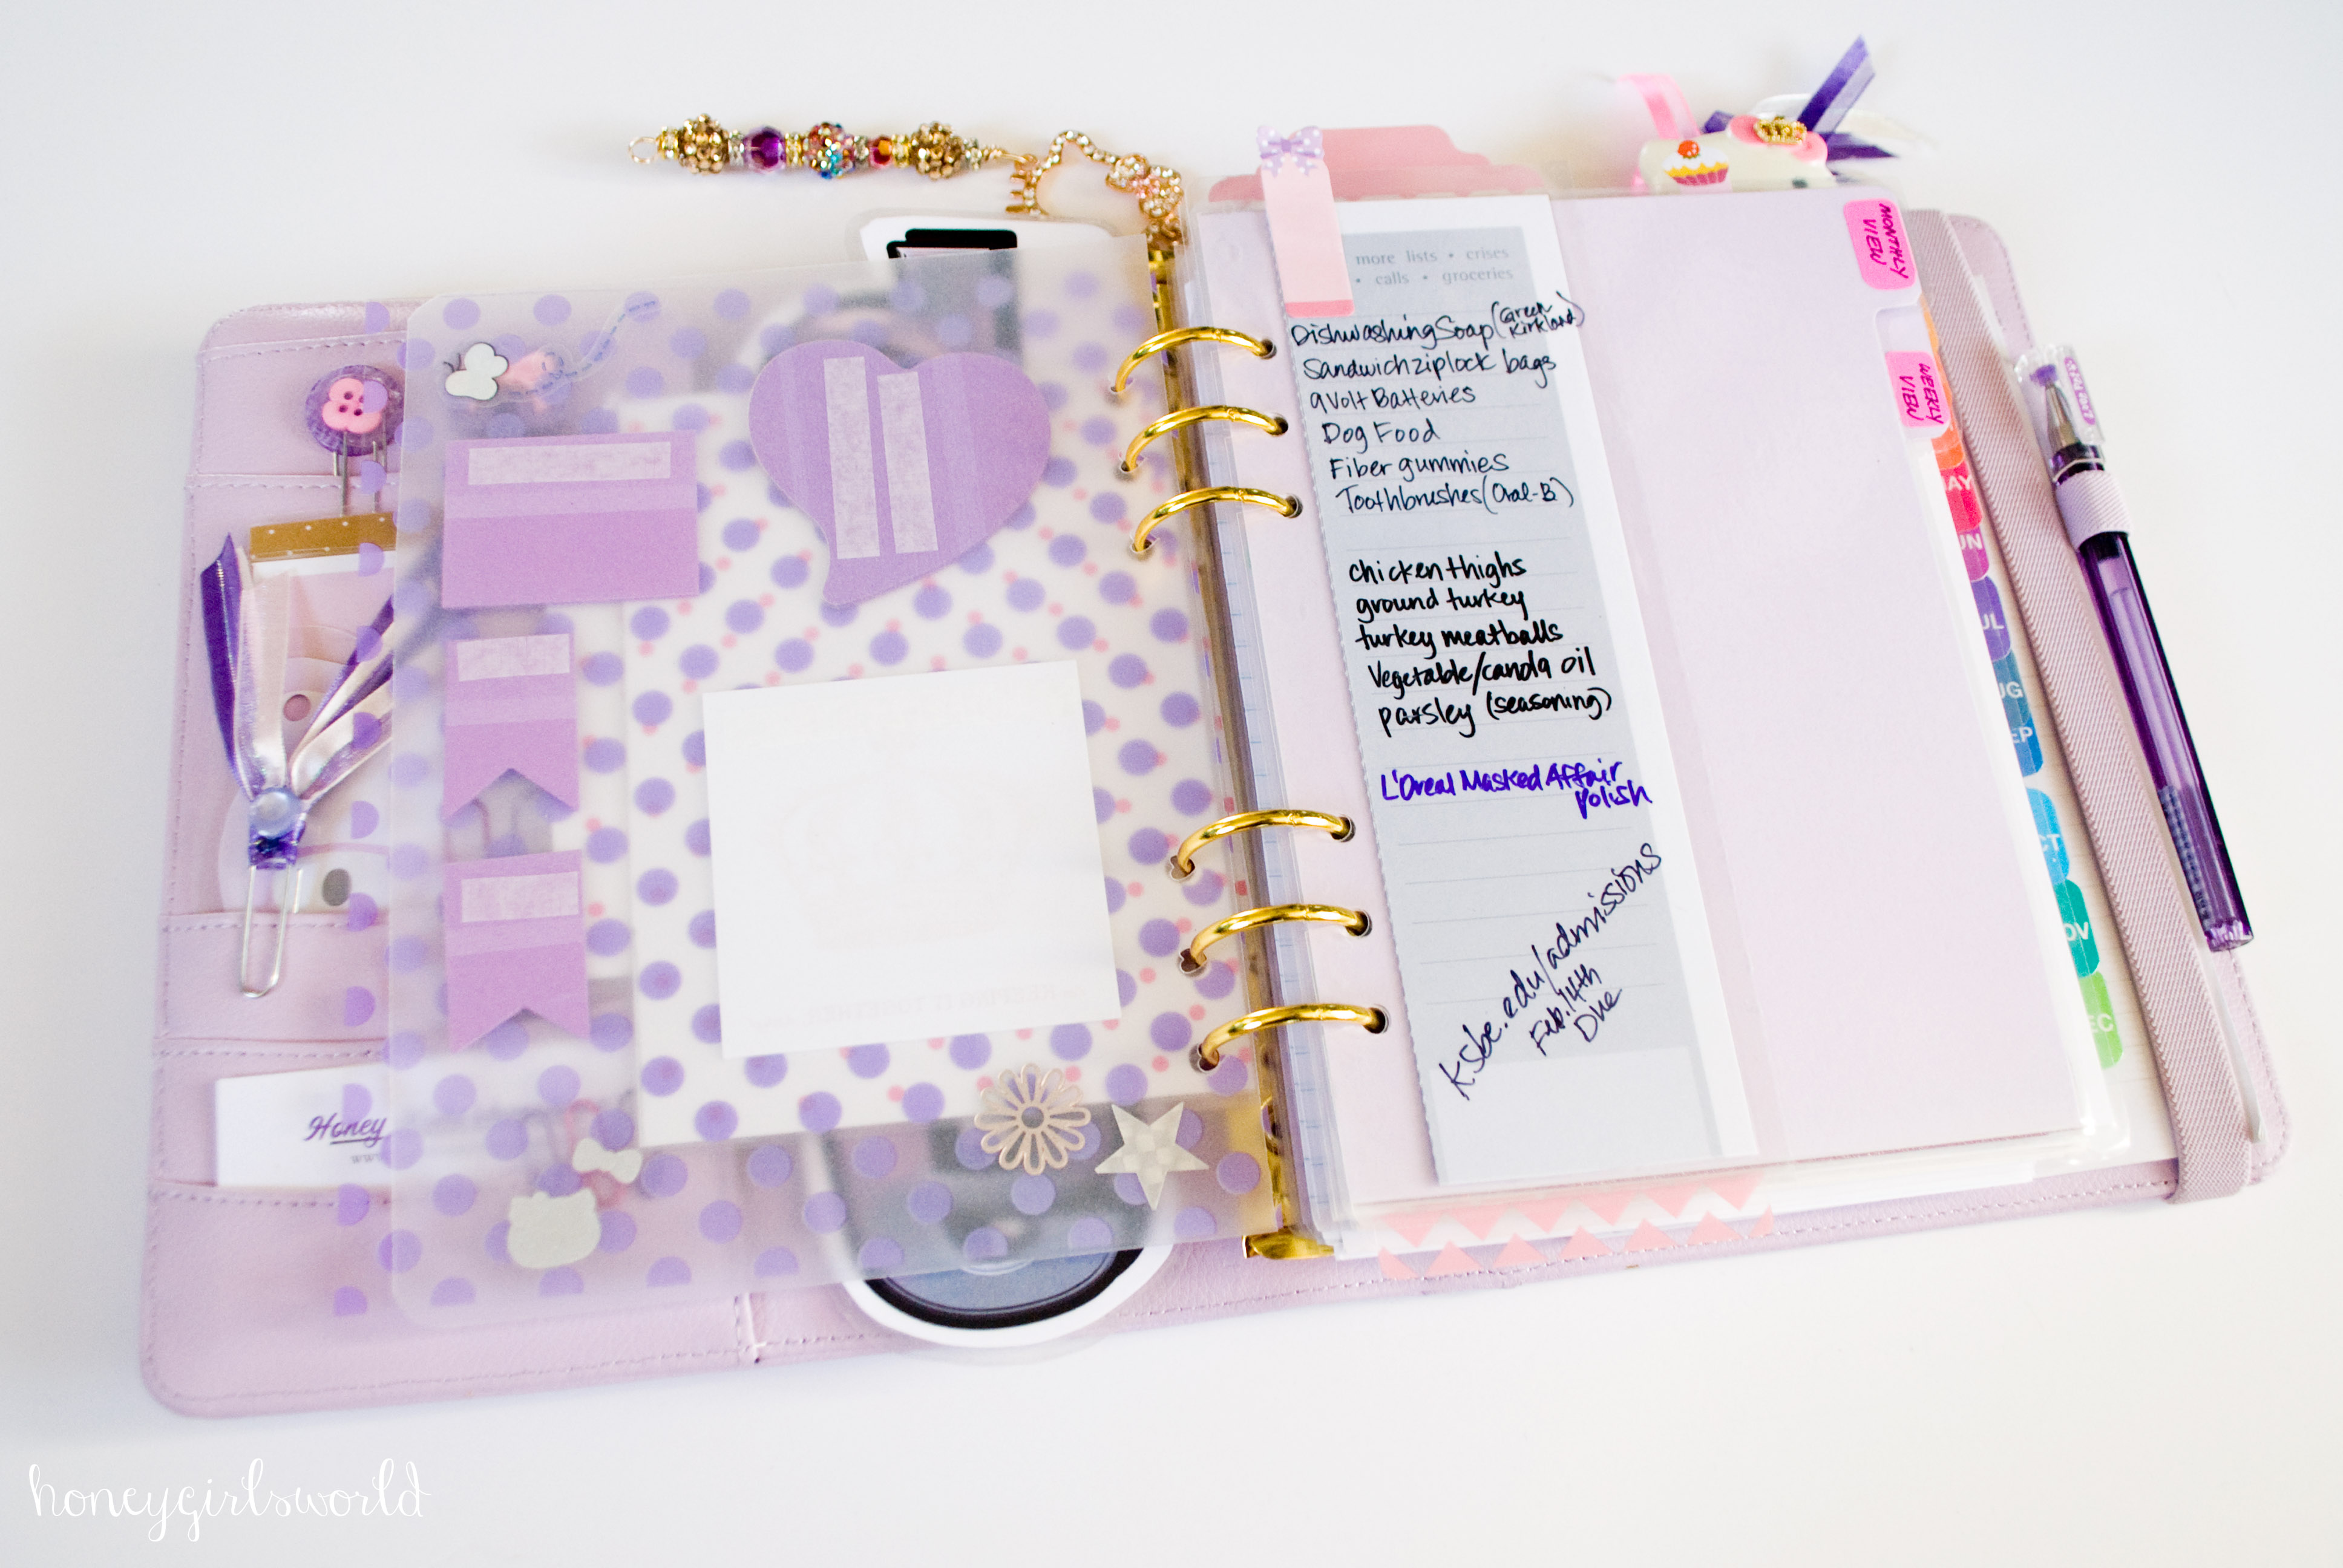
An important part of functionality in my planners is that I can write and erase what I have for lists, etc. This didn’t come with the planner but something I’ve adapted on my own over the years and it’s works – so why change it? As you can see from my shopping list, I use permanent markers or Vis-aVis Wet Erase markers to allow me to keep a list and then erase them when I’m done. I think that erasing or getting rid of a list once it is completed gives me a sense of accomplishment and I have the same type of system for my To Do’s as well.

Since the Kikki K came with Monthly and Weekly inserts that I was happy with – I stuck to using those and have been thoroughly enjoying them. Currently my Month on 2 Pages spread consists of my Blog and YouTube tracking. I place a dot on the days I post videos or blog posts to allow me a quick “at a glance” reference for the days I have posted. I’m sure in the next month I’ll change this and post an appointment calendar for quick reference of the month, but since I also put appointments into my Google Calendar, at the moment (which syncs with my phone) – I didn’t think it was needed.
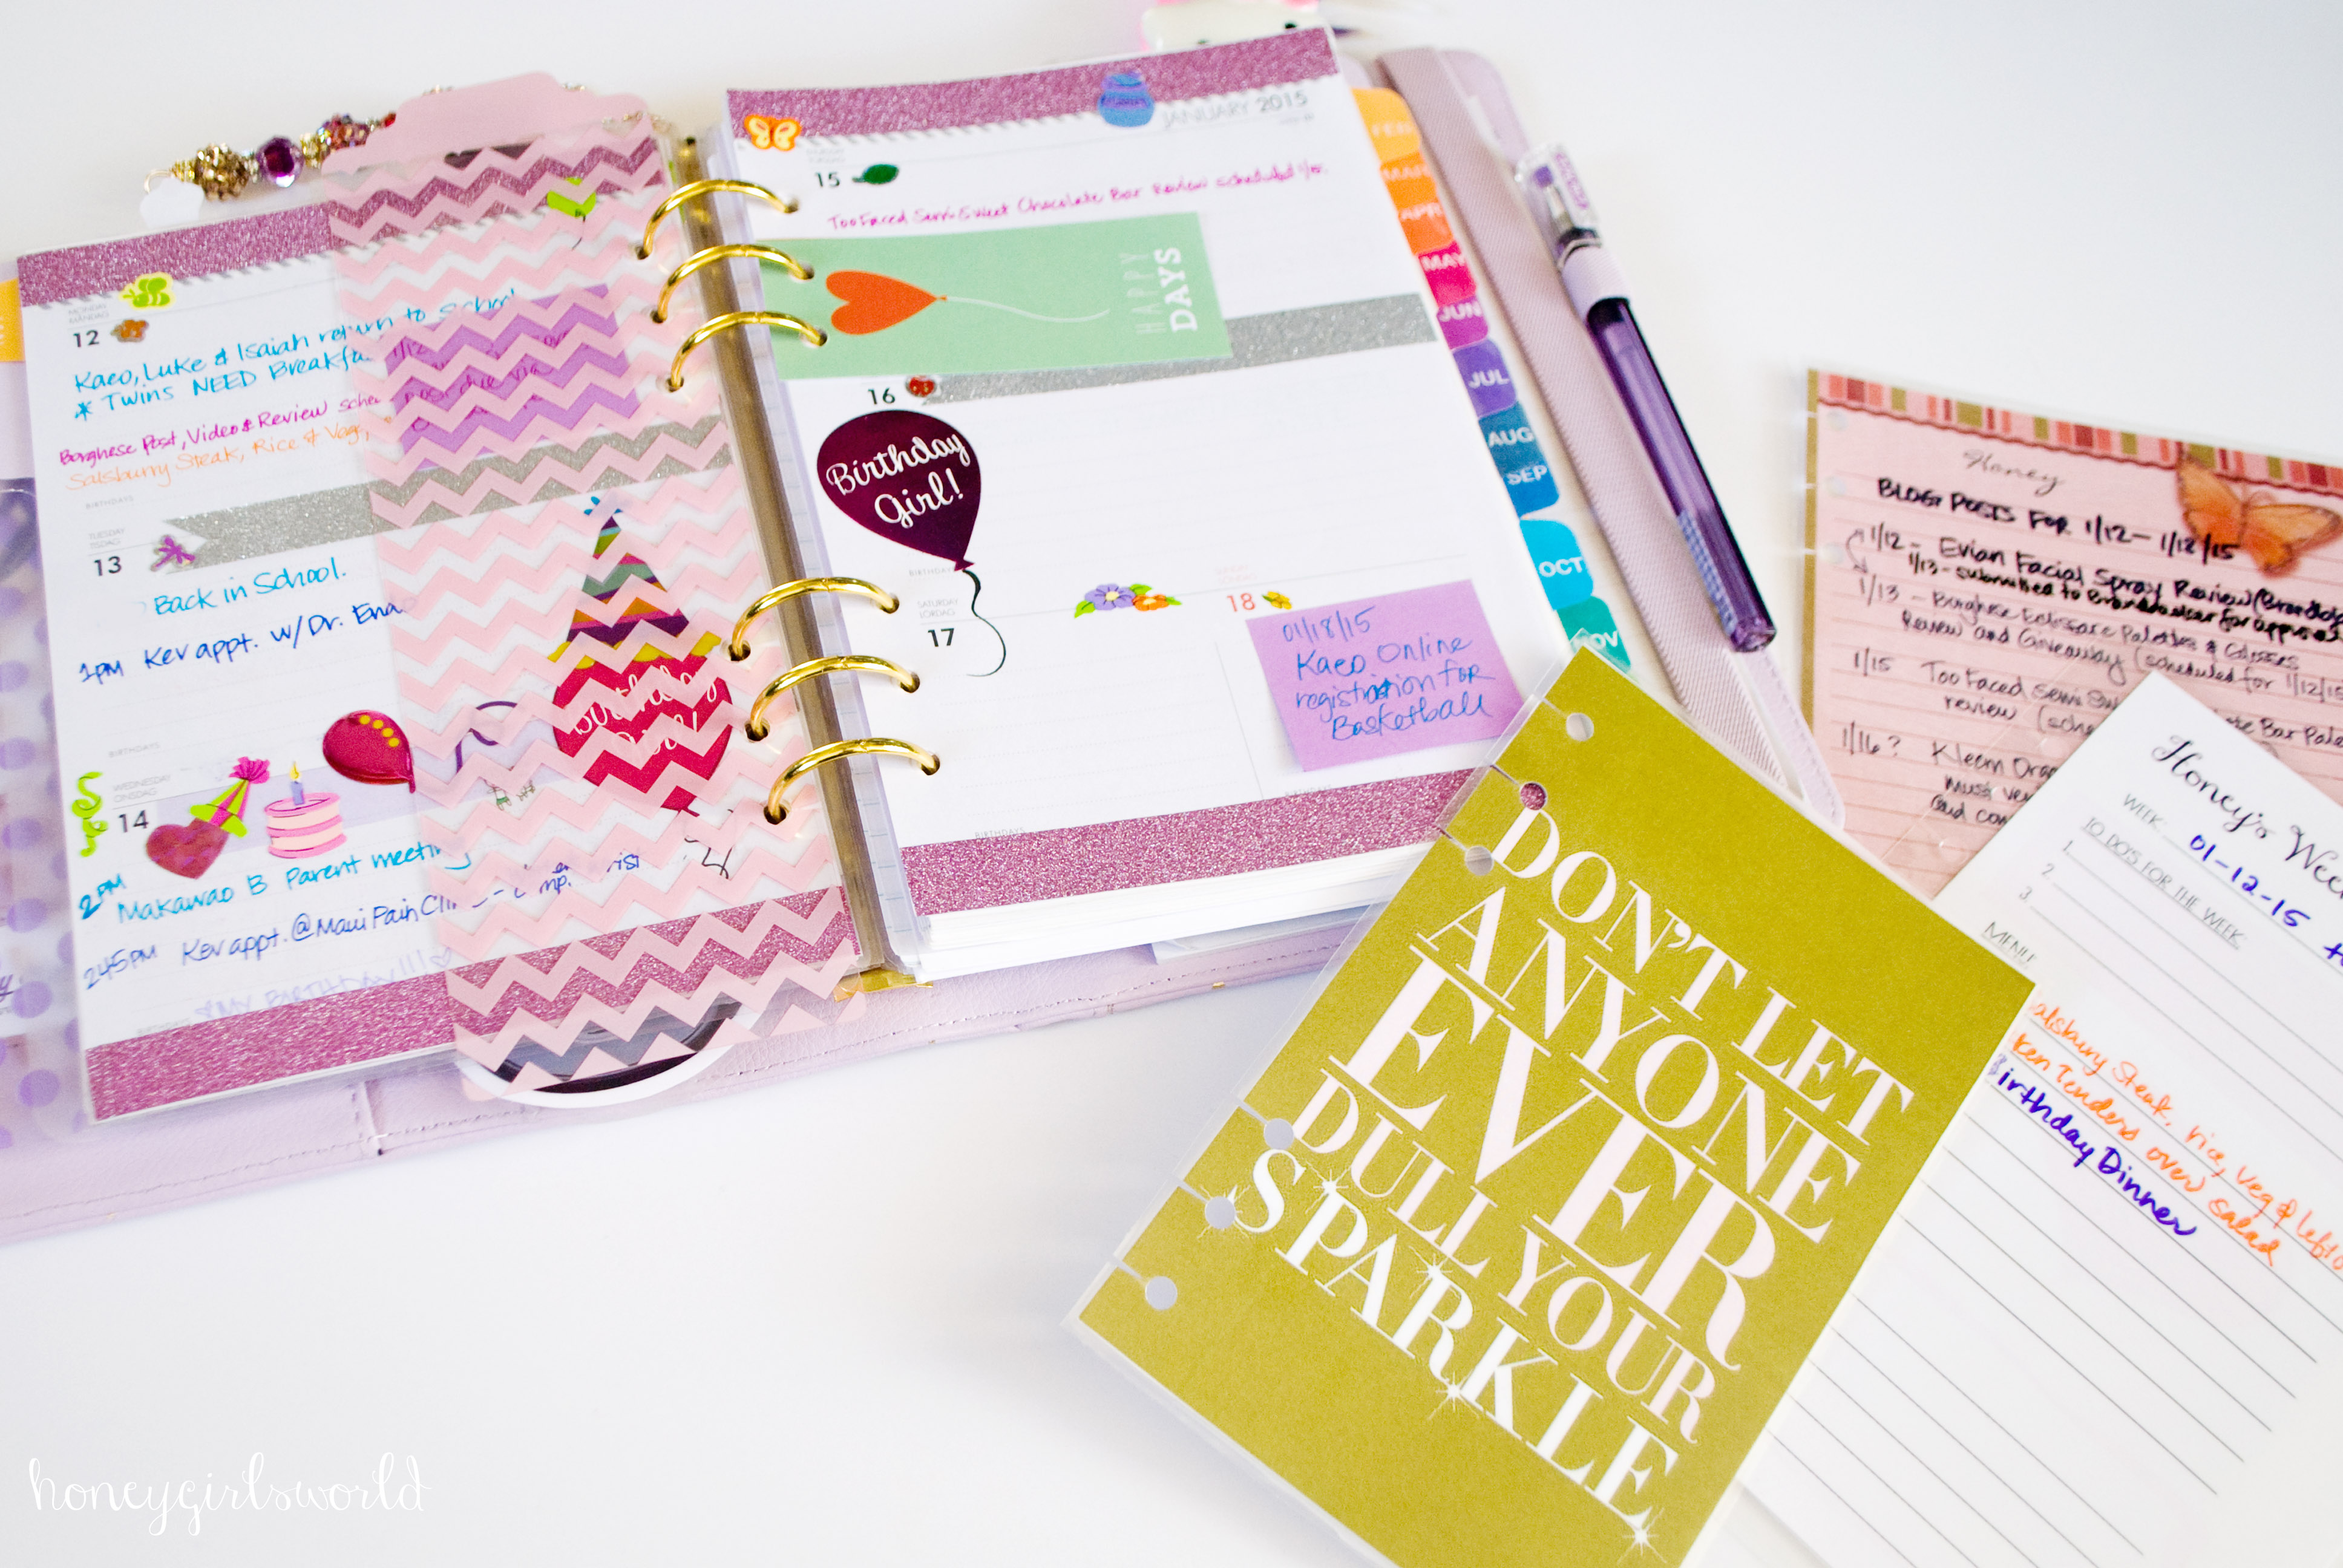
My week on two page spread is where I tend to write most of my information. Anything written in my planner is color coordinated using my Staedtler or Paper Mate Flare Pens. I like that the pen colors are the same so color coordinating using either or for me is easy. Anything having to do with my blog is Fuchsia, my sons – light blue, my husband – dark blue, appointments for me in purple, food and meal planning in orange, etc. I’ve had this color system for years in each of my planners already so I remember them easily without needing a reference. My week on two pages also includes inserts I pop in from time to time like quotes, project life cards, photos, invitations for the week, etc.

Stuck in the center of my Week on Two Pages, I also have a Weekly Planning list that includes another laminated page that I can write in my To Do List for the week, a menu plan for that week (usually dinners) and then a shopping list. This gets erased each week and to keep track of meals, my meals are transferred into the weekly inserts so I can refer to them later. If you feel you ever need more room to write goals, to do’s or anything else for the week and it is something you will throw out once accomplished, this is a great way to do so… laminate your page and use erasable markers to write each week.

One important section in my planner is my Life and Inspiration section. This is the only section that I have a quote on the divider for or any decoration. Within this section I have a card I printed on my computer with the Minimalist Mantra (which you can Google), reminding me that less is definitely more. I also have my 2015 Goals for the year. These goals are on-going and don’t have a set due date for them. Things like “write 5 blog posts a week” and “drink my green juice daily”. I also write in quotes I find inspirational and I want to keep with me often as well as any affirmations. Since I keep track of my weight loss journey via my week on two page spread, I may also use this section for little tips and inspiring things for my weight loss as well. Anything that I think will inspire me, add something extra to my life or just make me smile, will go in this section.

Of course I couldn’t have a planner without a blogging section. I have a blog section in my planner that allows me to track upcoming or planned blog posts, ideas I may have while out and about or on a whim as well as any samples that came in from brands. My printer died on me while I was setting this section up – but I have inserts for each that I have used the last few years, but for now – besides this blog layout you see here, the rest is all scribbled on lined paper. Once my printer is back in the grind, I’ll post what inserts I use for my blog tracking, etc. There are a few that I think may benefit some of my bloggy friends.

My YouTube section is quite similar to that of my blog section and I track things kind of the same way. Since they coincide with one another I think it is great to have a similar lay out so that I can keep my flow going. I list my tracking here for YouTube (since sometimes videos I do are not the same as my blog posts, etc.) and I also have some lined paper that I use to jot down ideas for upcoming videos or even to write out tag questions. This of course will be much more detailed once I get my printer going so I’ll be sure to update on that in a later post.

My To Do section is just a bunch of papers labeled “To Do” but I also utilize a laminated sheet here as well. This sheet can be removed and put into my week if my list is too long to fit in the “Top 3” for my Weekly Planning. Again, I like to get rid of things once they are done, so once my list is complete, I erase what’s written on the laminated sheet. I honestly don’t know that I’ll be keeping this section here and I may be replacing it – but for now… it is what it is. In the future, I may decide to just put the “To Do” list in my week on two page spread and move along the calendar each week since I designed the sheet to easily come in and out of the planner.
The last section is my “Meal Planning” section in my planner. I don’t have a picture because as I mentioned before my printer is broken so all I have are some lined sheets with a list of meal ideas or meals my family enjoys. Once my printer is fixed or I get a new one, this section will be broken down with inserts I created on my computer. It will include a Seasonal Meals section that will allow me to list meals that include items that can only be found seasonally here like strawberries. There will also be a planning page that lists foods that are priced well or expensive during certain seasons, i.e. Turkey is probably the cheapest to buy during Thanksgiving holiday and more expensive other times of the year. Of course, this is also the section that I will list my families favorite foods, grocery store prices, etc.
So that was my lengthy break down of my 2015 Planner set up. I’ll be honest in saying that this was the shorter version of it all… but planning or organization in any form is never a quick thing to explain I guess. Having never used anything from Kikki K before I am proud to say that I have moved in to my new Unicorn nicely and have been enjoying it the last month since I got it. It’s weathered well with me transporting it to and from the store or out to run errands and the inserts and pages take the ink I use fairly easily. Let’s not forget that I’m absolutely obsessed with the color of it and I hope they come out with a richer purple because I’ll be adding that to my list as well. For an in-depth break down of my planner, be sure to watch the video where I get into some detail, talk story and so much more and I promise I’ll be keeping up with these posts – I’ve surely missed doing them.

Kikki K – Time Planner or Personal Planners
http://www.kikki-k.com/ (if you sign up as a member, you can get a $10 discount/credit)
Erin Condren Life Planner https://www.erincondren.com/referral/invite/honeykahoohanohano0114 (If you use my link you will get $10 off your order)
Keeping It Together Planner https://www.etsy.com/shop/KITLife
Disclaimer: I have referral links through out this post for Erin Condren. Everything discussed in this post otherwise was purchased by me.