Category

Makeup

Category

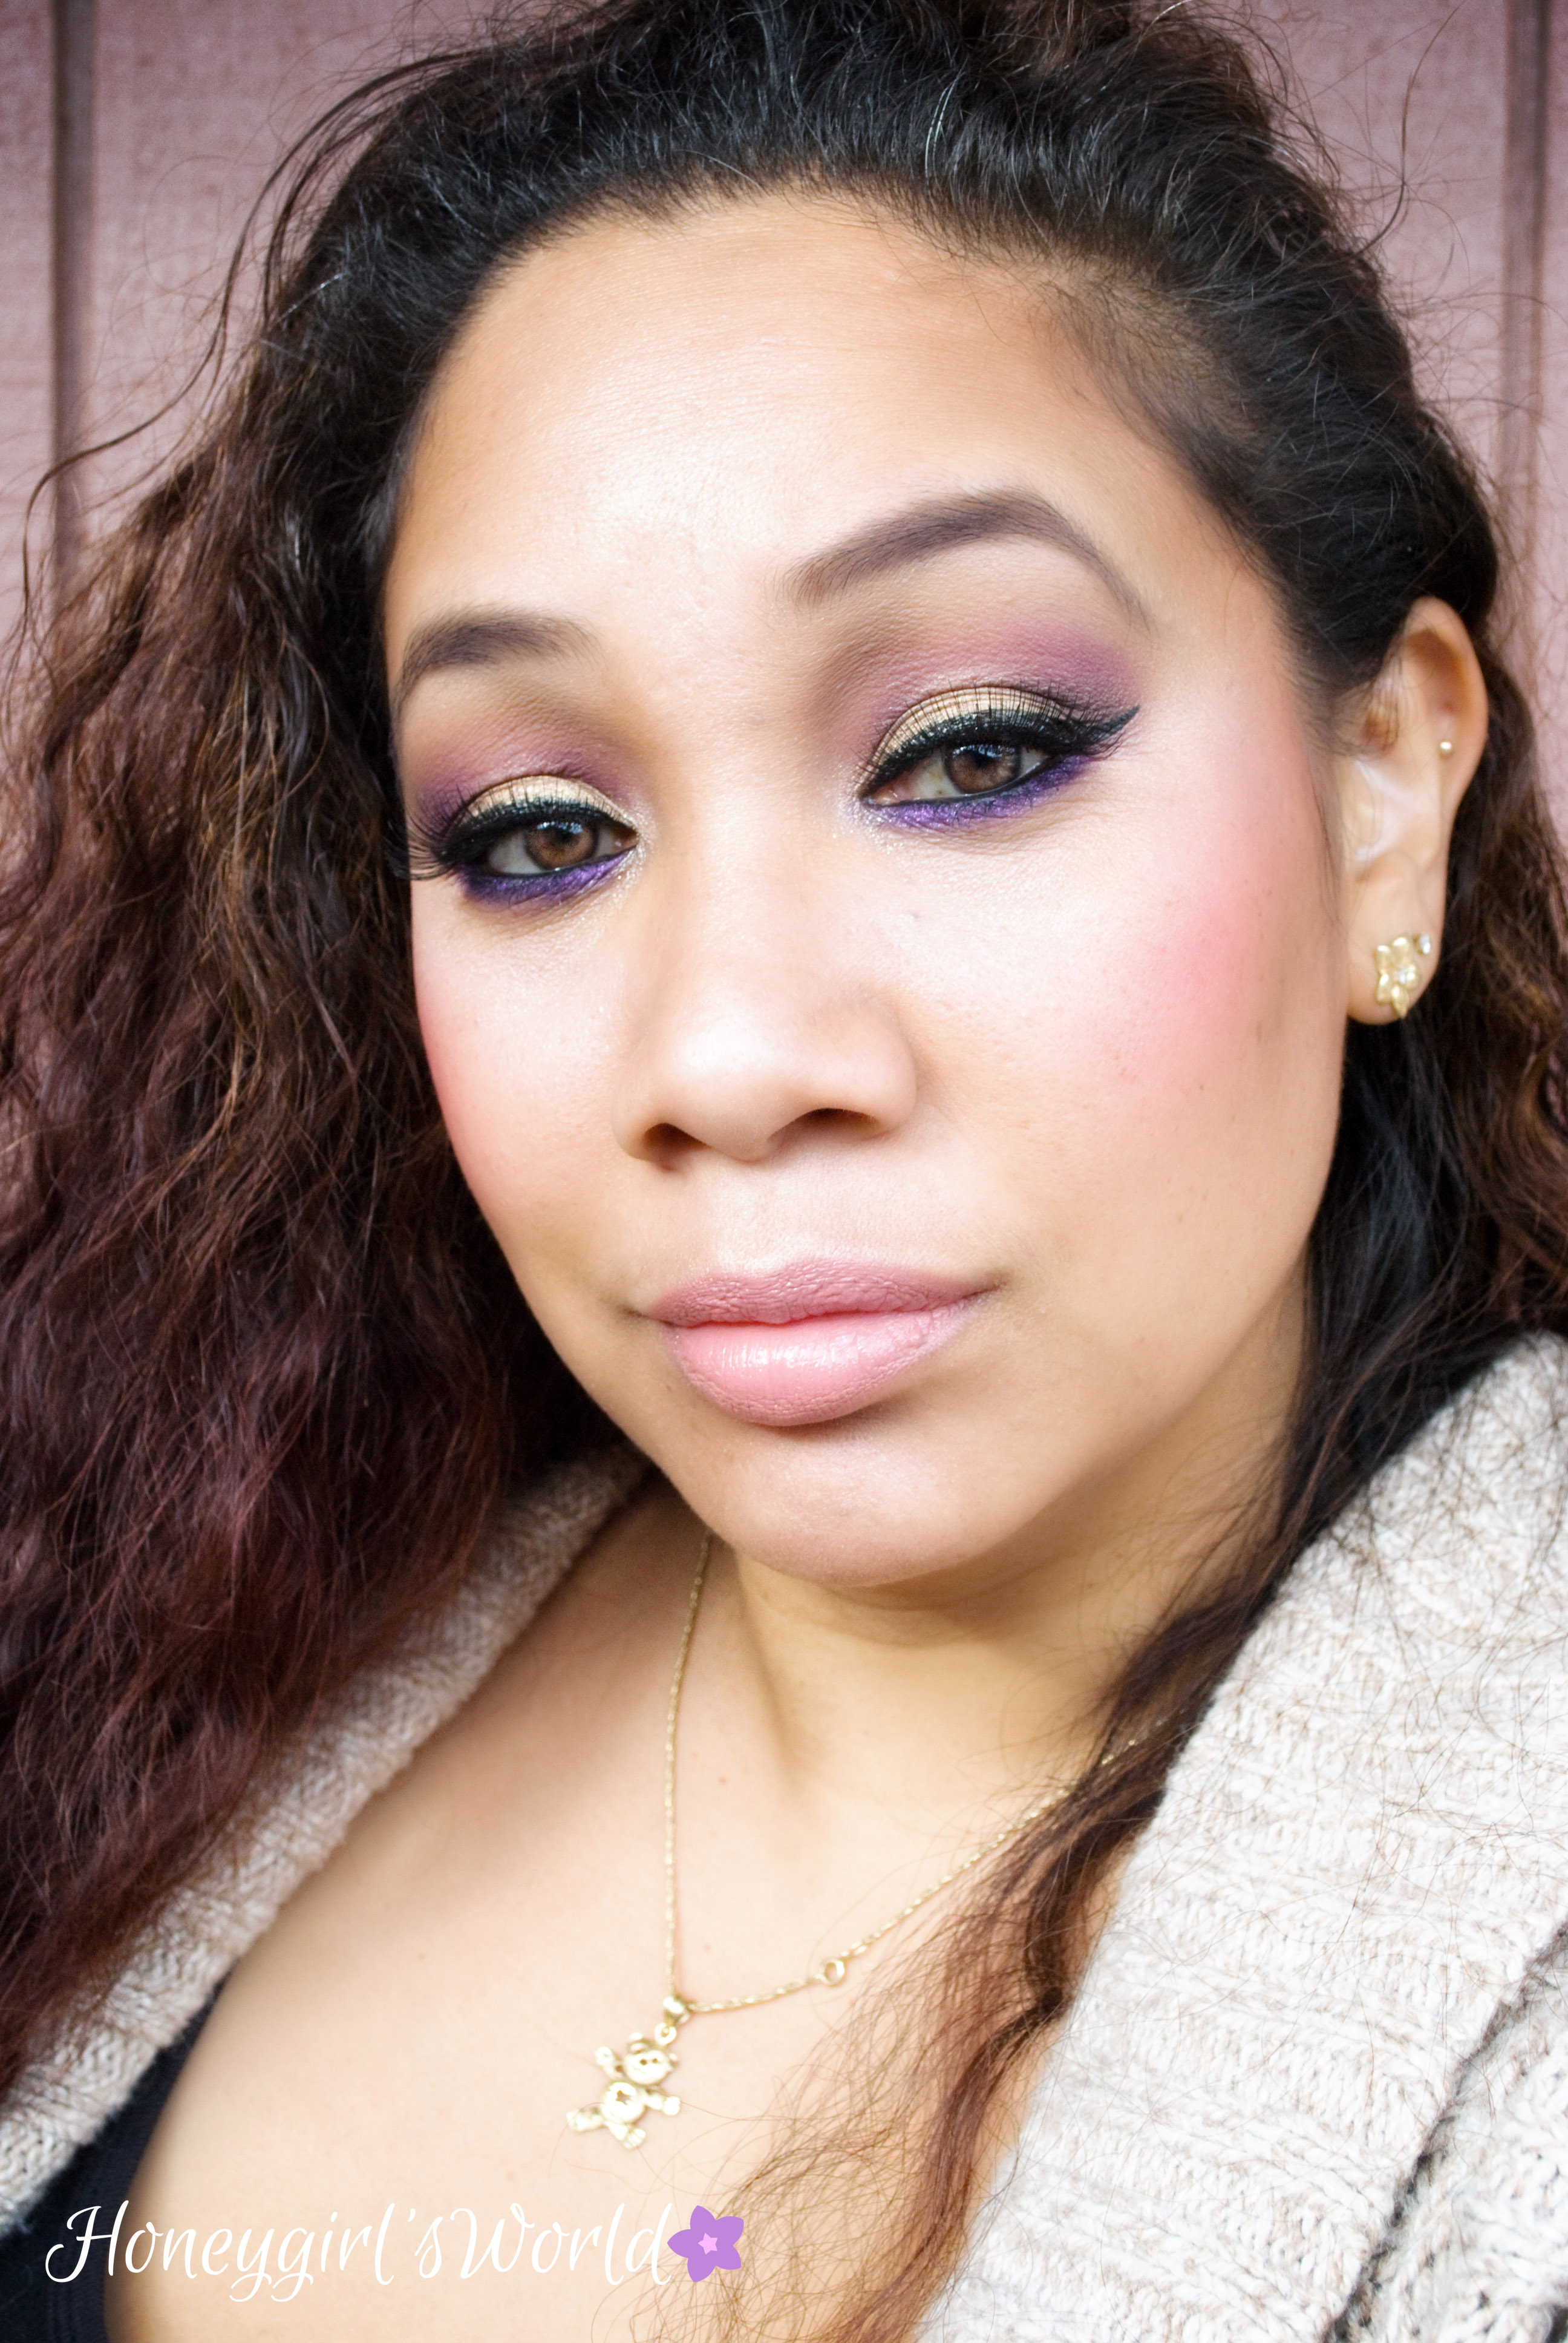
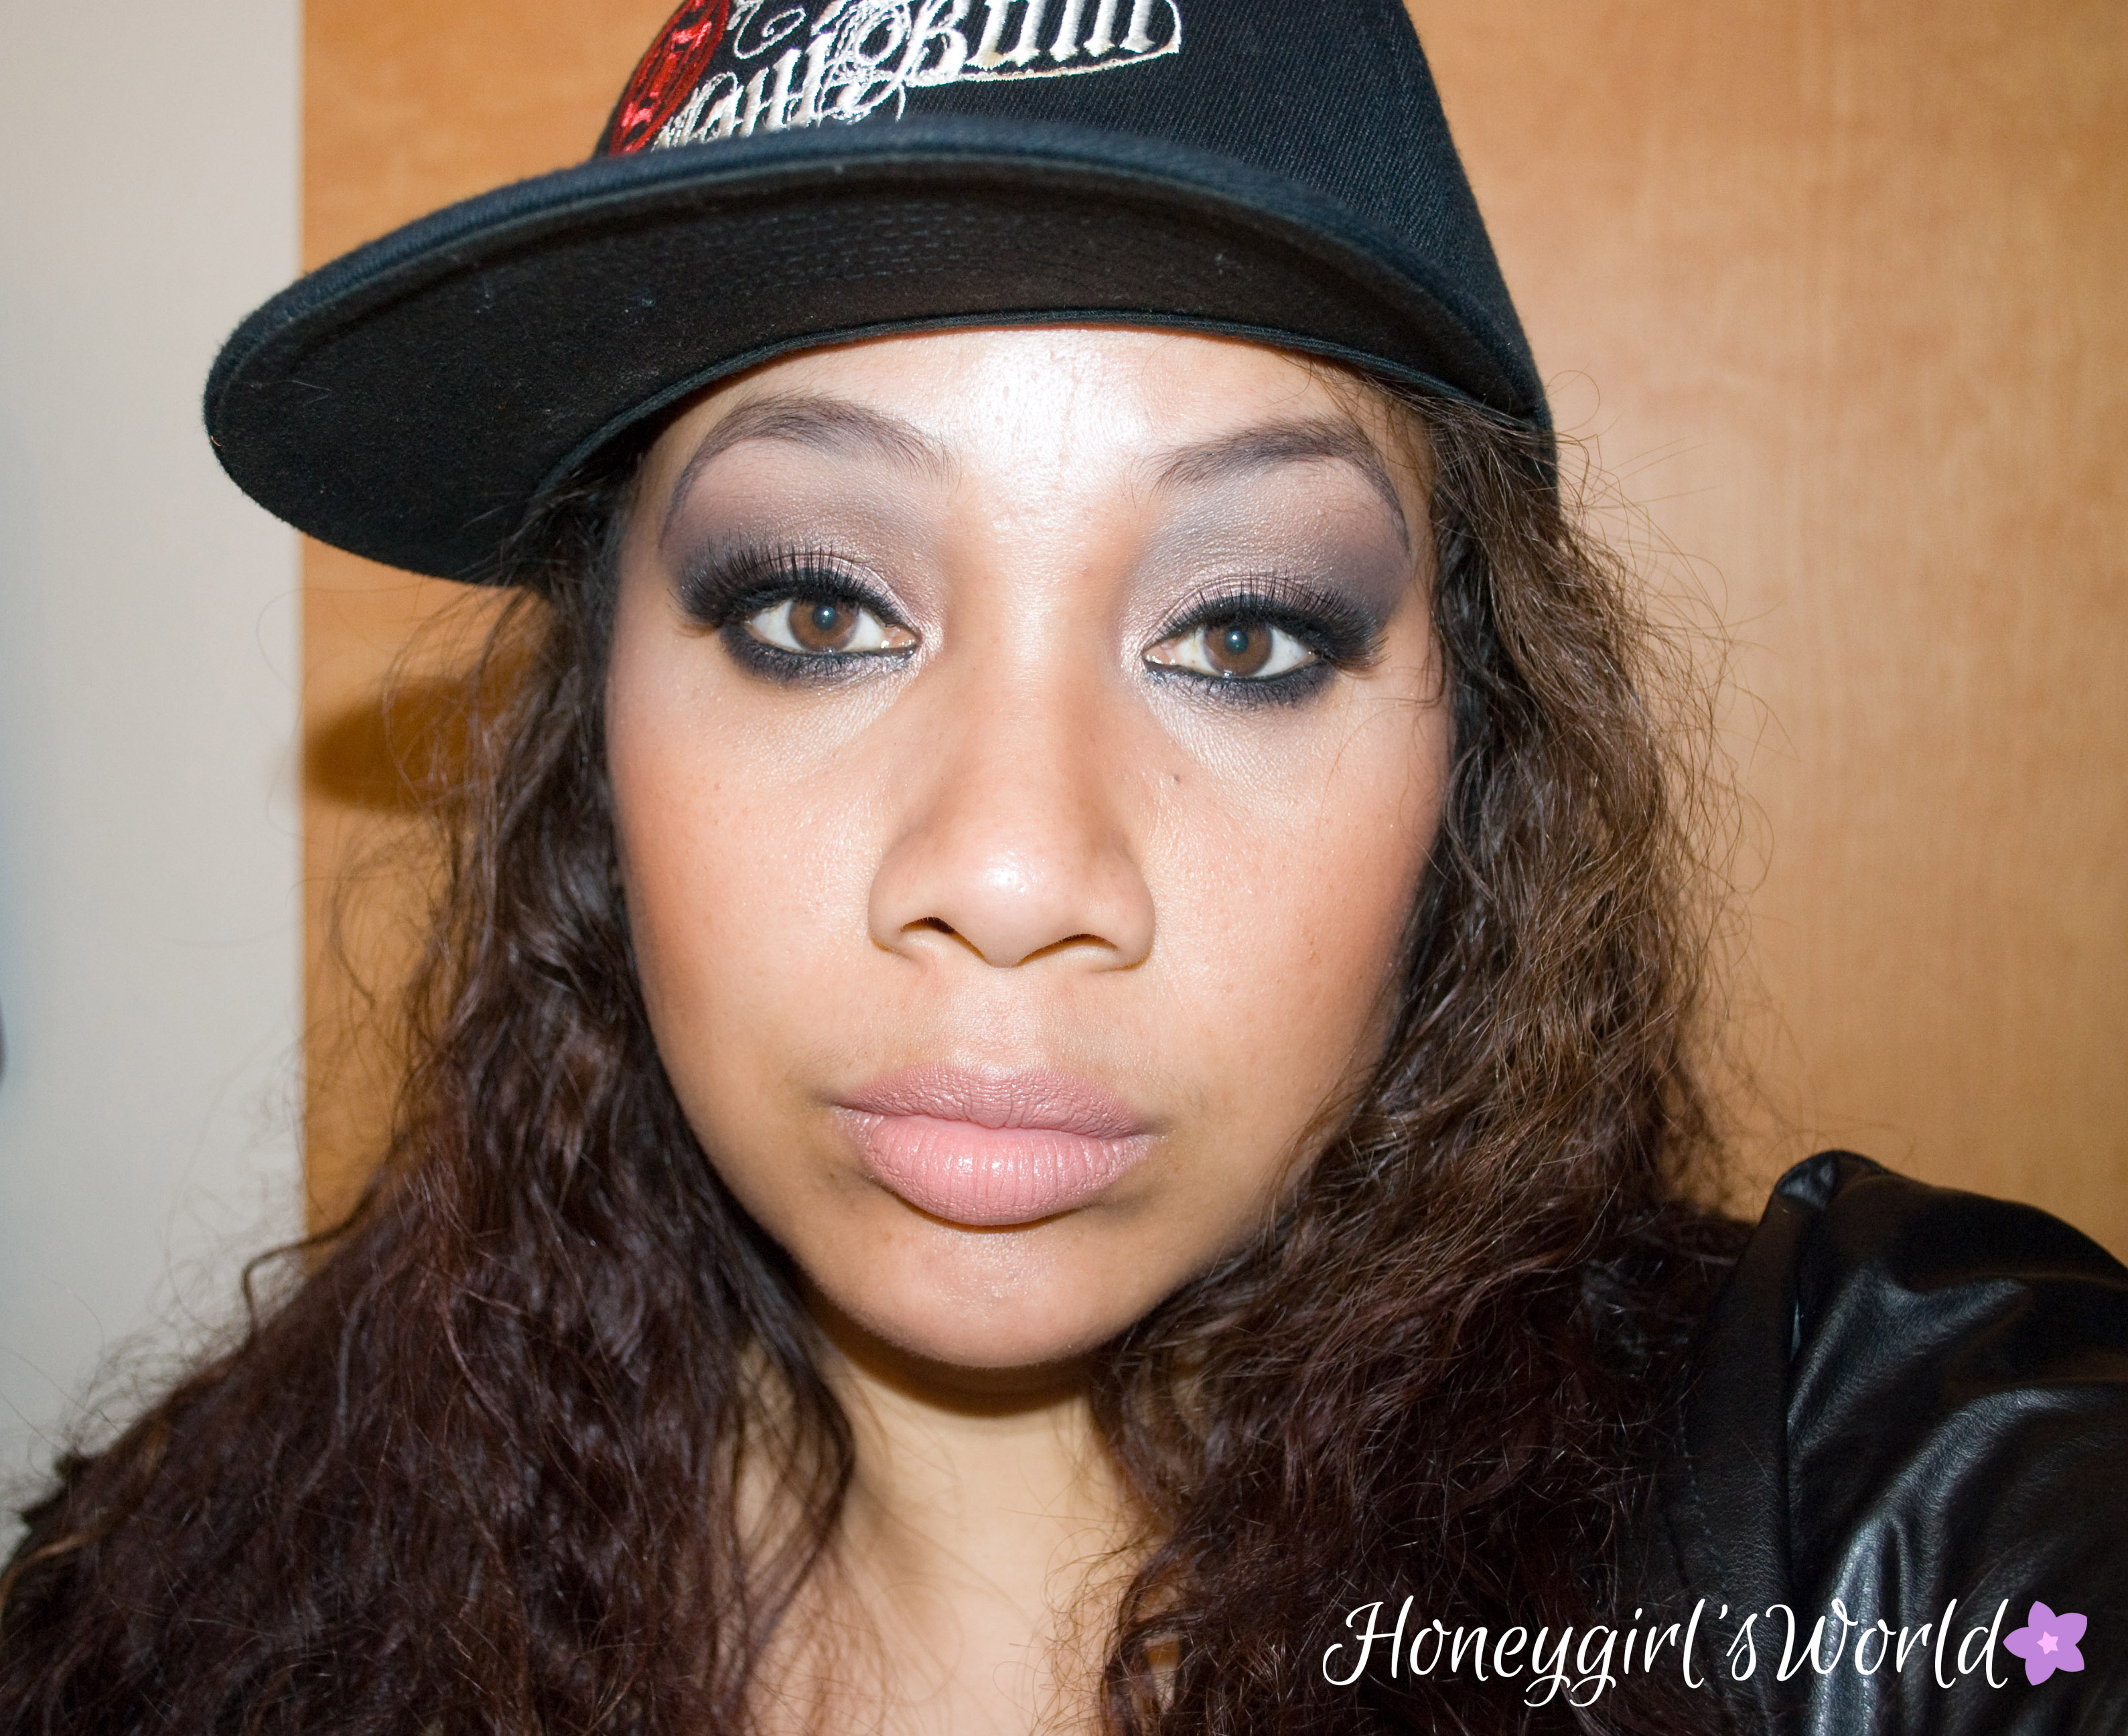
I get asked often… “How do you do a smoky eye that is easy but also doesn’t make me look like I punched myself in the eyes?”  Honestly, a smoky eye is quite easy and does not have to be the black eye shadow people are so used to associating with the look.  I create smoky eyes in a variety of shades – my favorites being purple and brown.  The definition of a smoky eye is just that it must be well blended shadows creating the look of well blended eye makeup – no harsh lines.

Easy Smoky eye - Tarte be MATTEnificent

For the look I created, I wanted to utilize one of my favorite palettes – the Tarte be MATTEnificent Palette.  I am not going to lie – I am a matte eye shadow junkie and I will pull for a matte palette in my collection over one with only shimmer shades.  At 34 years old, I try to use colors and shadow textures that will not settle into my fine lines or make me look too “frosty”.  For this look – I utilized a 3 step system that I like to do for an eye look that will get me in and out of the house in a hurry (busy mommy status):

  • Step one – (after priming your eyelid) was a neutral toned shade (usually a cream matte shade) all over the lid and up to the brow bone.  I call this the transition blending shade.
  • Step two – take a shade you want to wear on your lid (in my case it was a plum purple) and with the same brush you used to apply your transition blending shade, apply the color all over your lid and into the crease – do not go above the crease.  Take this same color and run it on the lower lash line making sure to blend the line so it looks soft and diffused.
  • Step three – take a shade you would like to wear in the crease – I normally opt for a taupe or brown shade.  Take a blending brush and work this color into your crease blending it out so that there are no harsh lines.

If you want – you can always reapply your brow bone high light shade to create more definition but make sure that you blend well.

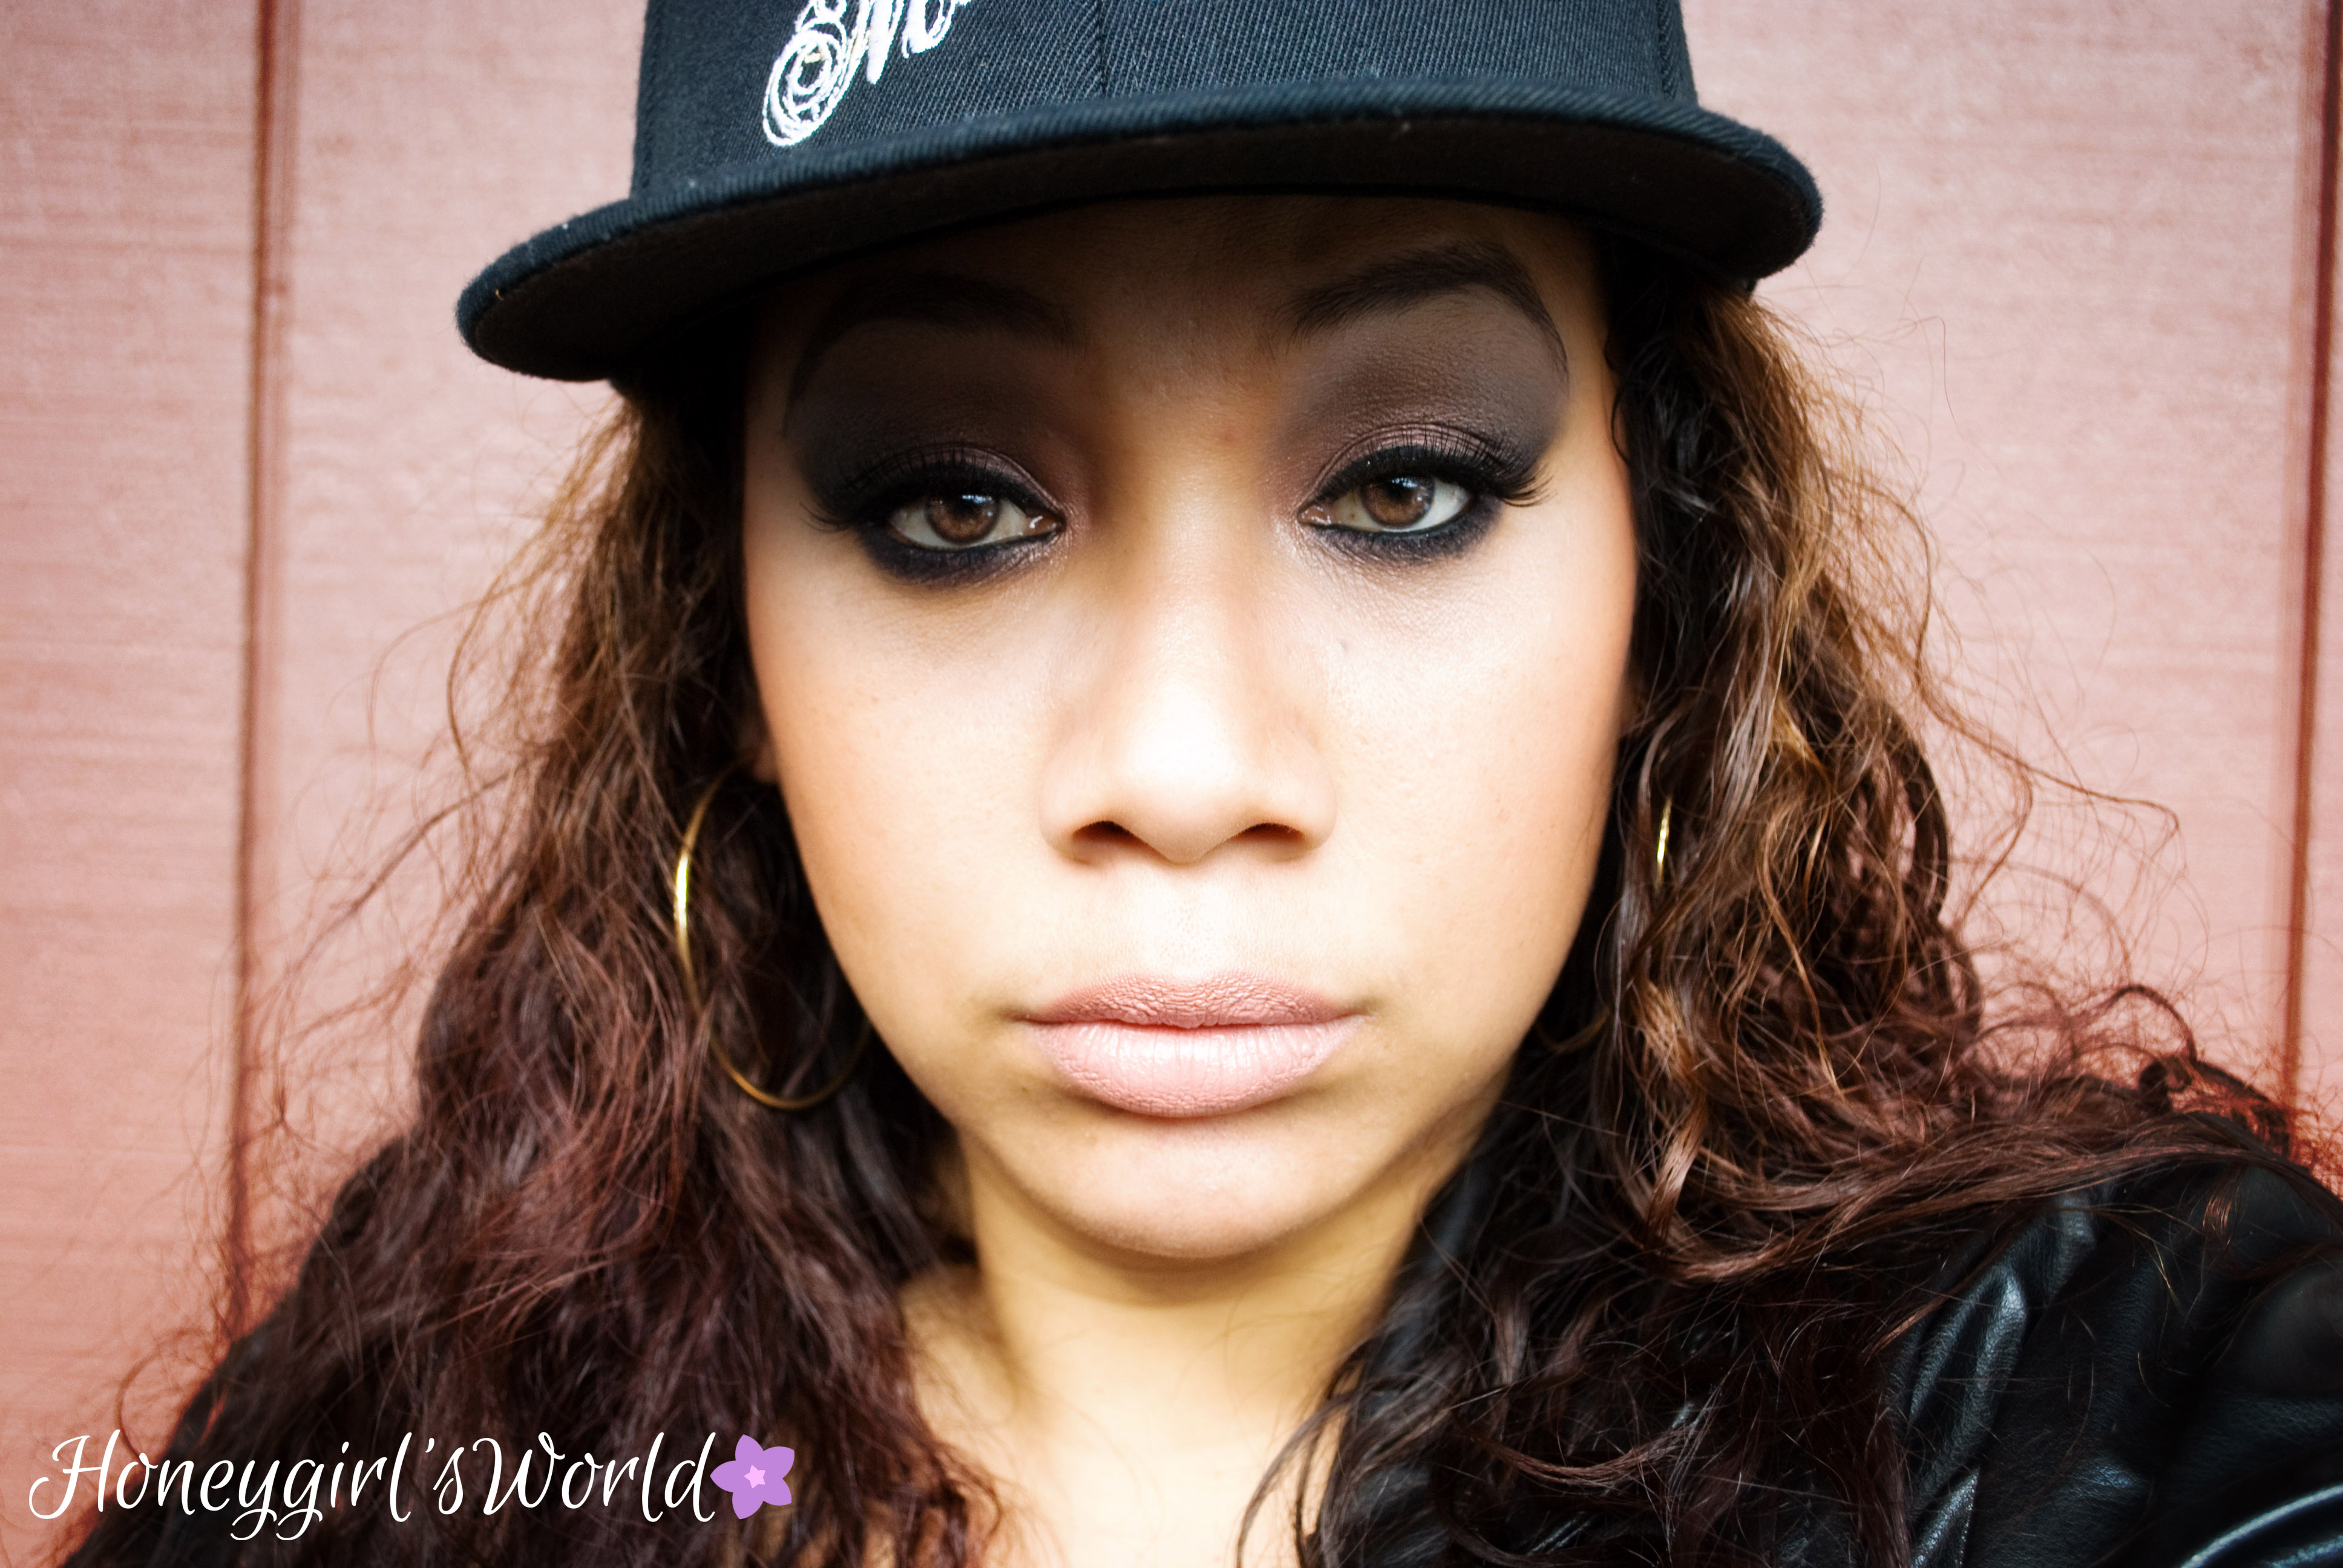
That is it.  You can add your favorite eye liner, mascara and you’re good to go.  Check out my Get Ready With Me Video (embedded below) for a full run down on the eye makeup as well as how I contour, highlight and add blush.  I talk through the process so it is a little longer than it actually is to create the look.  If you want to watch the video on YouTube – click here.
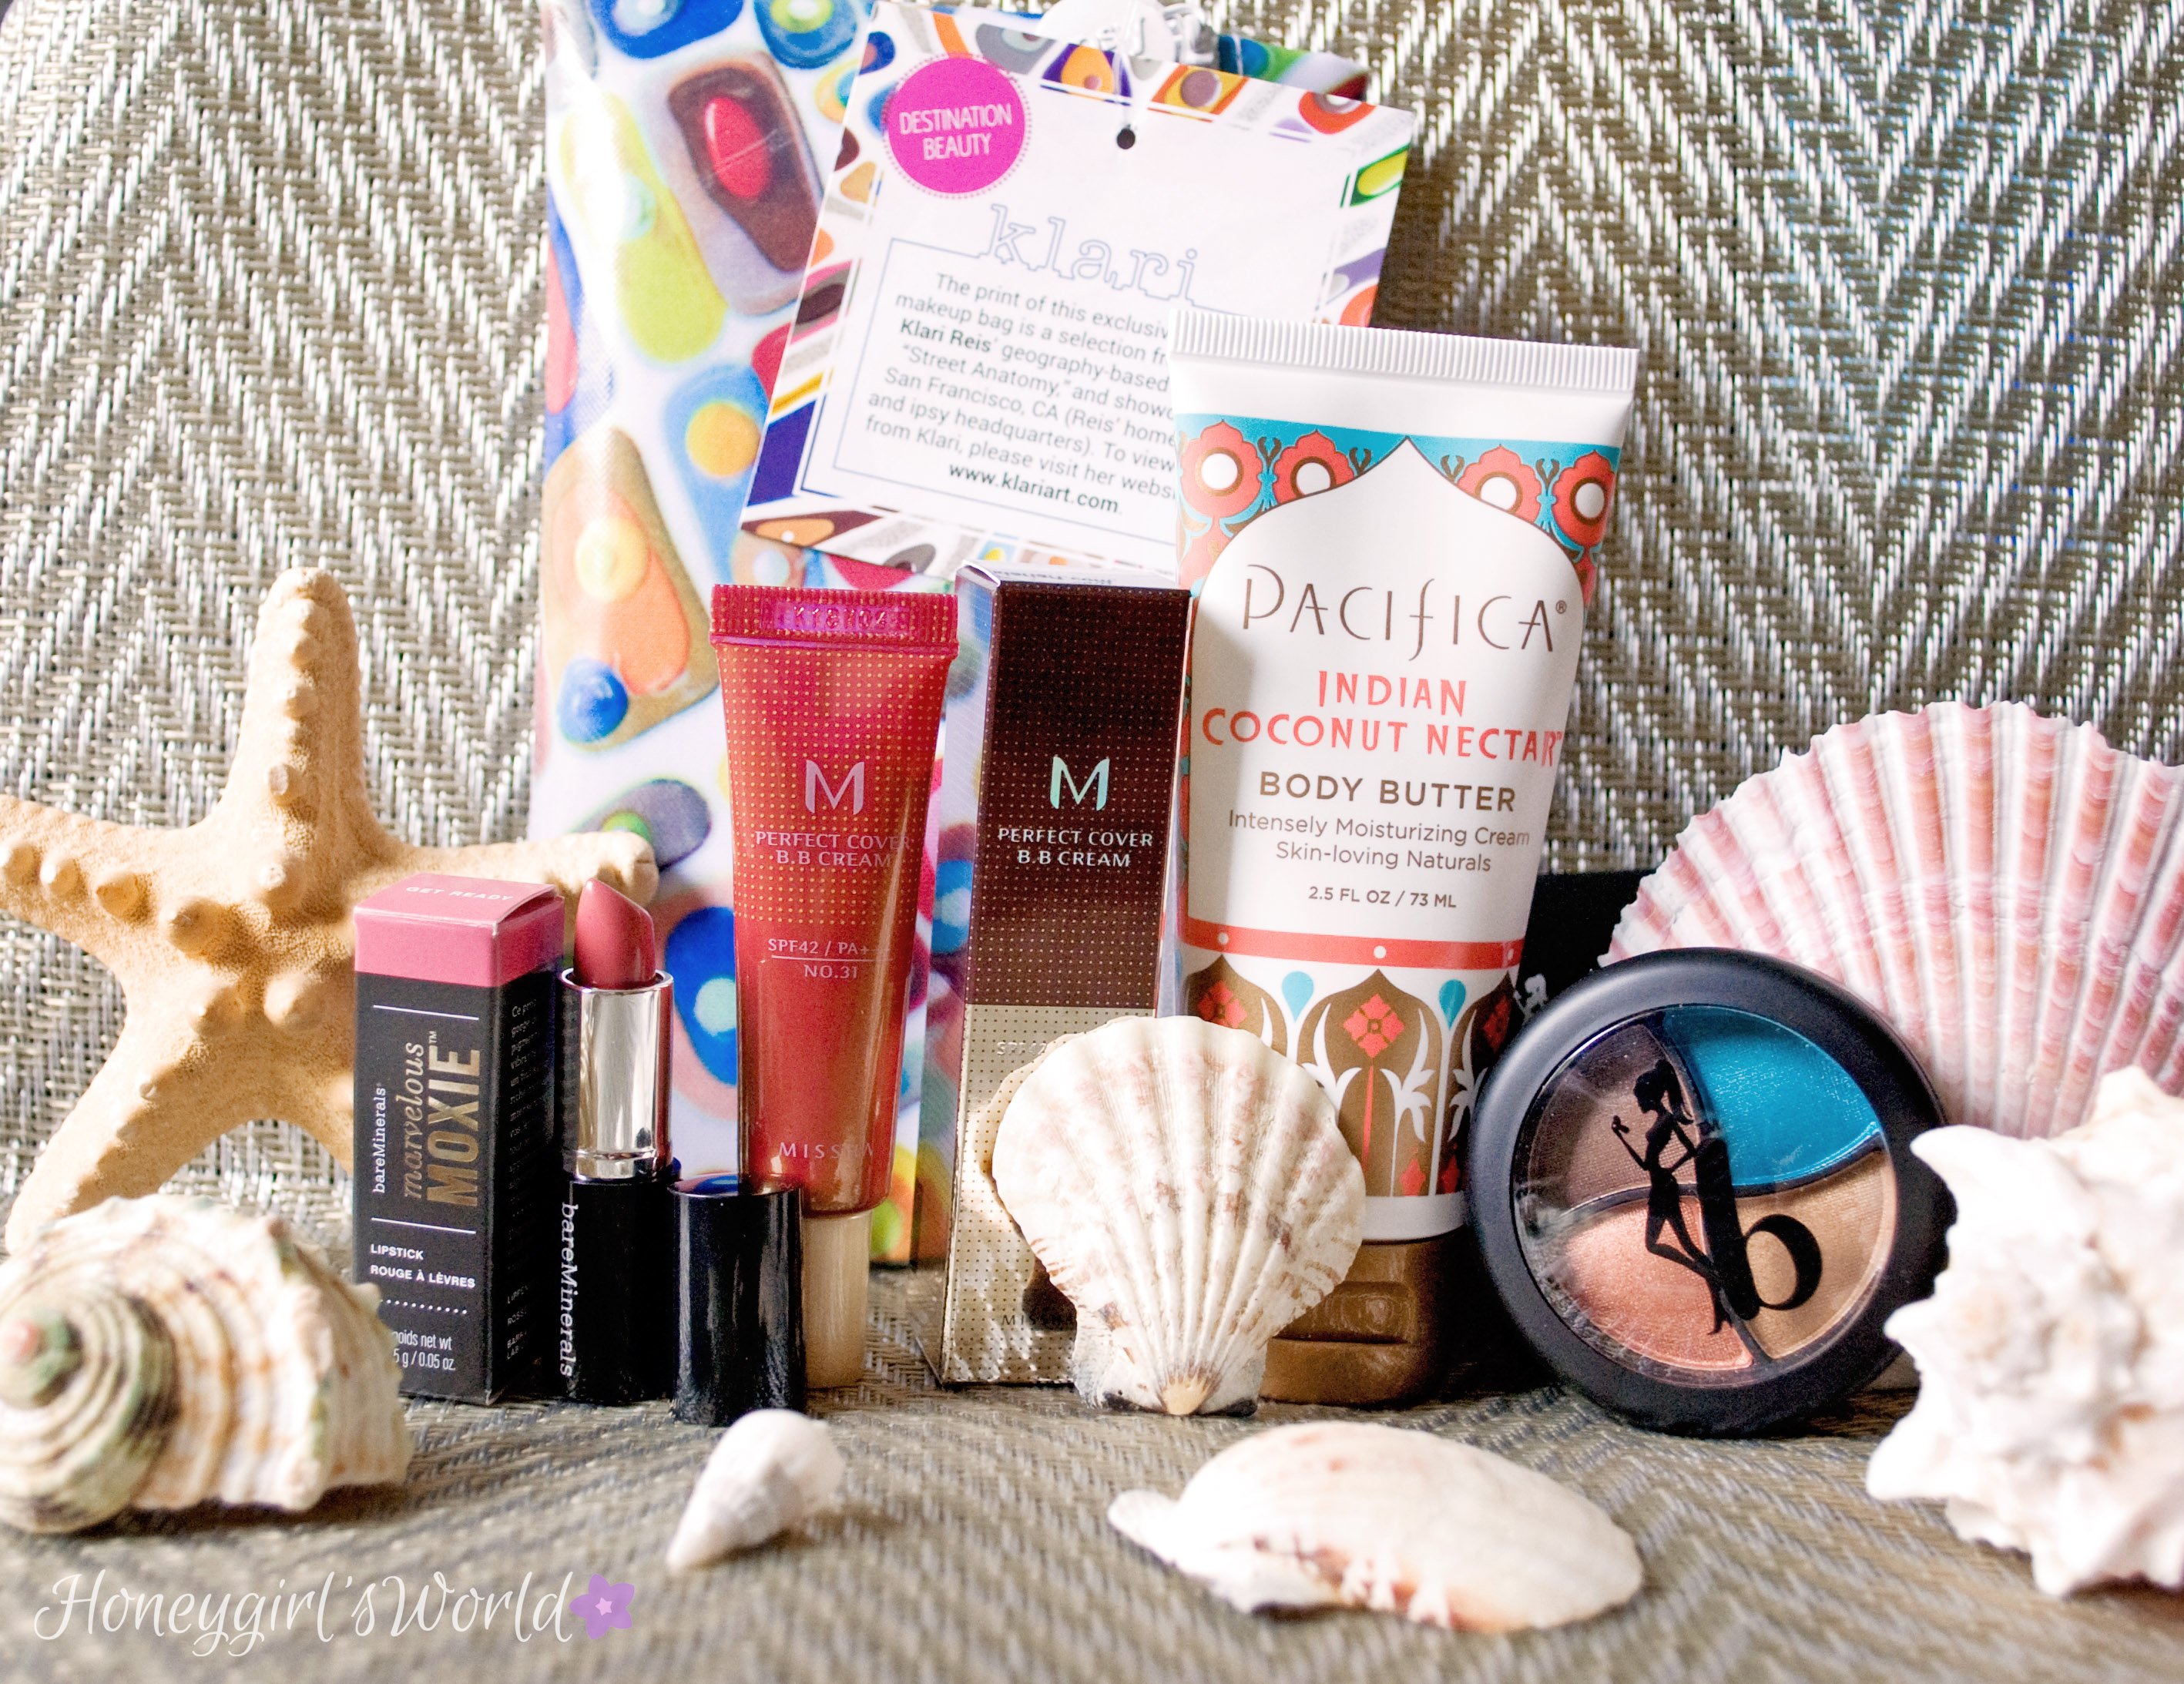
If you enjoyed my video – please Subscribe, Comment & Like!

Easy Smoky Eye - Tarte be Mattenificent

Products used:

Moisturizer – Organic Unrefined Virgin Coconut Oil, Tilth Beauty Anti Aging Firming Moisture Cream & PRAI Radiant Gemstone Cream

Brows – Perfekt Beauty Brow Perfection Gel

Eye Primer – Too Faced Shadow Insurance

Eye shadow – Tarte be MATTEnificent Palette

  • all over the lid from lash line to brow bone = sand out from the crowd (lid and highlight shade)
  • lid into the crease = two plums up
  • crease shade = rose to the occasion

Liner – Tarte Smolder Eyes in Brown (lower lash line / waterline and upper lash line) and Mally Evercolor Starlight Waterproof liner in Midnight (tight line & water line)

Lashes – KISS Lashes in 01 and Perfekt Beauty Mascara in Flash

Bronzer – NYC Sunny

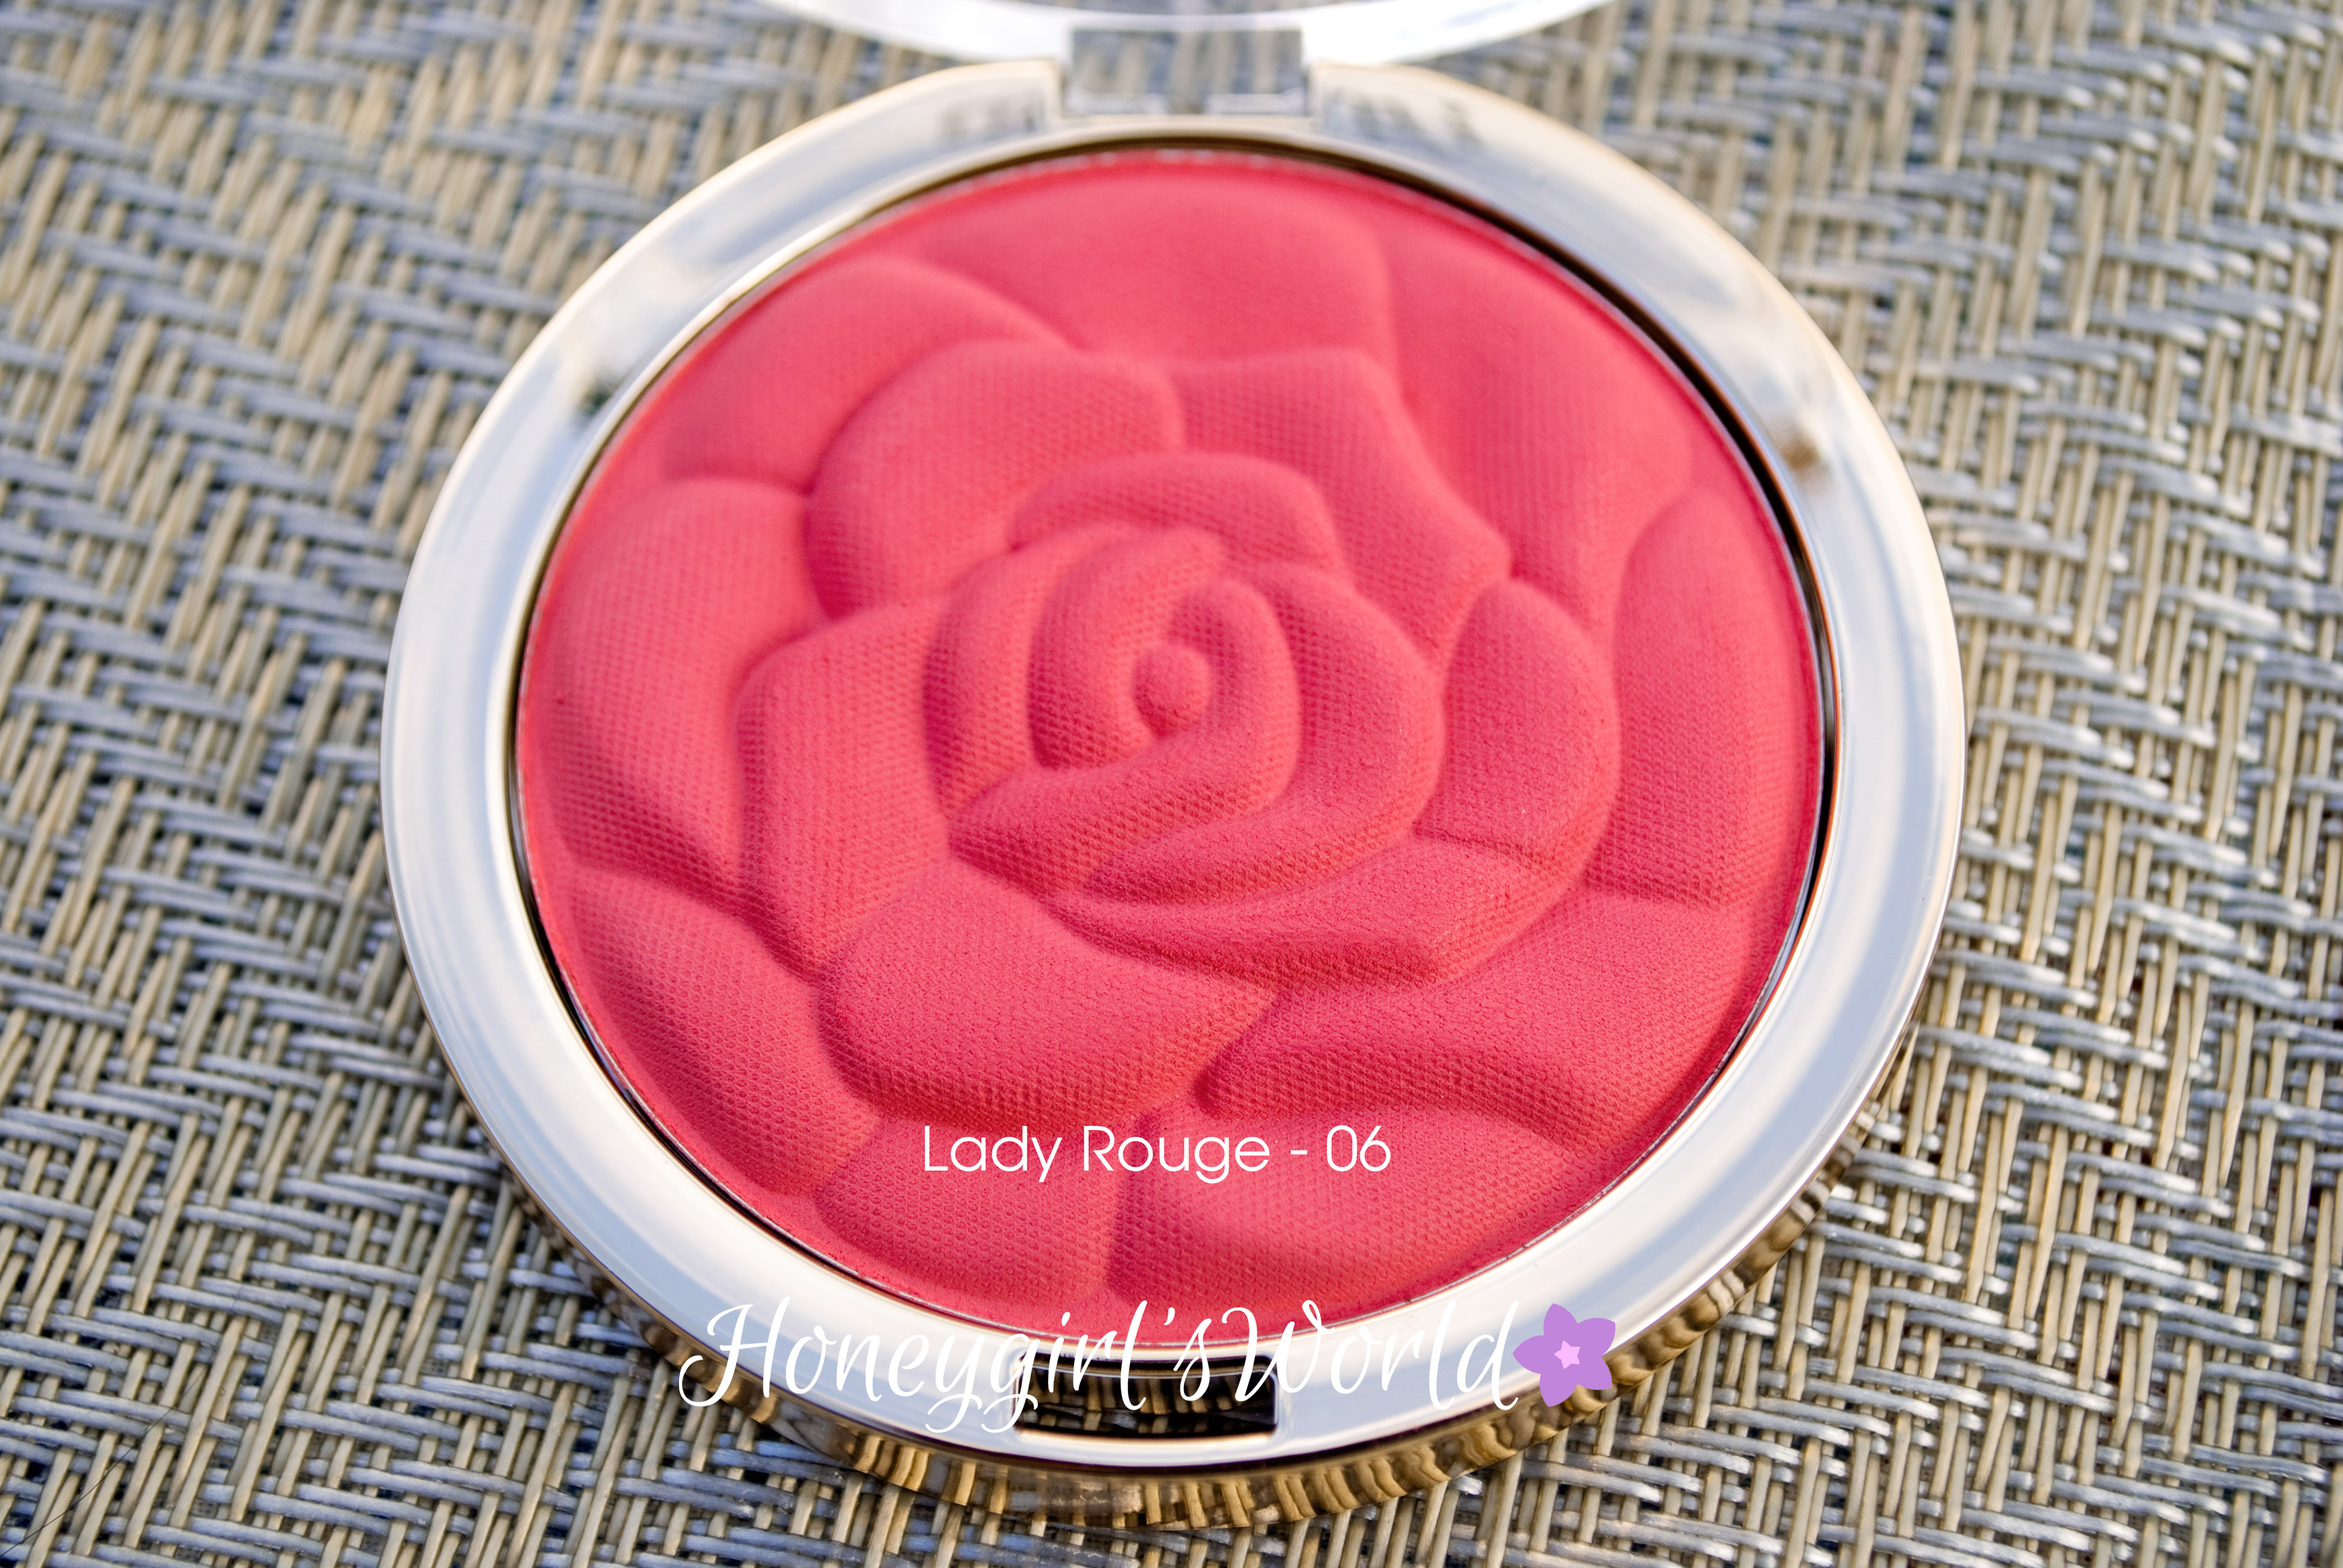
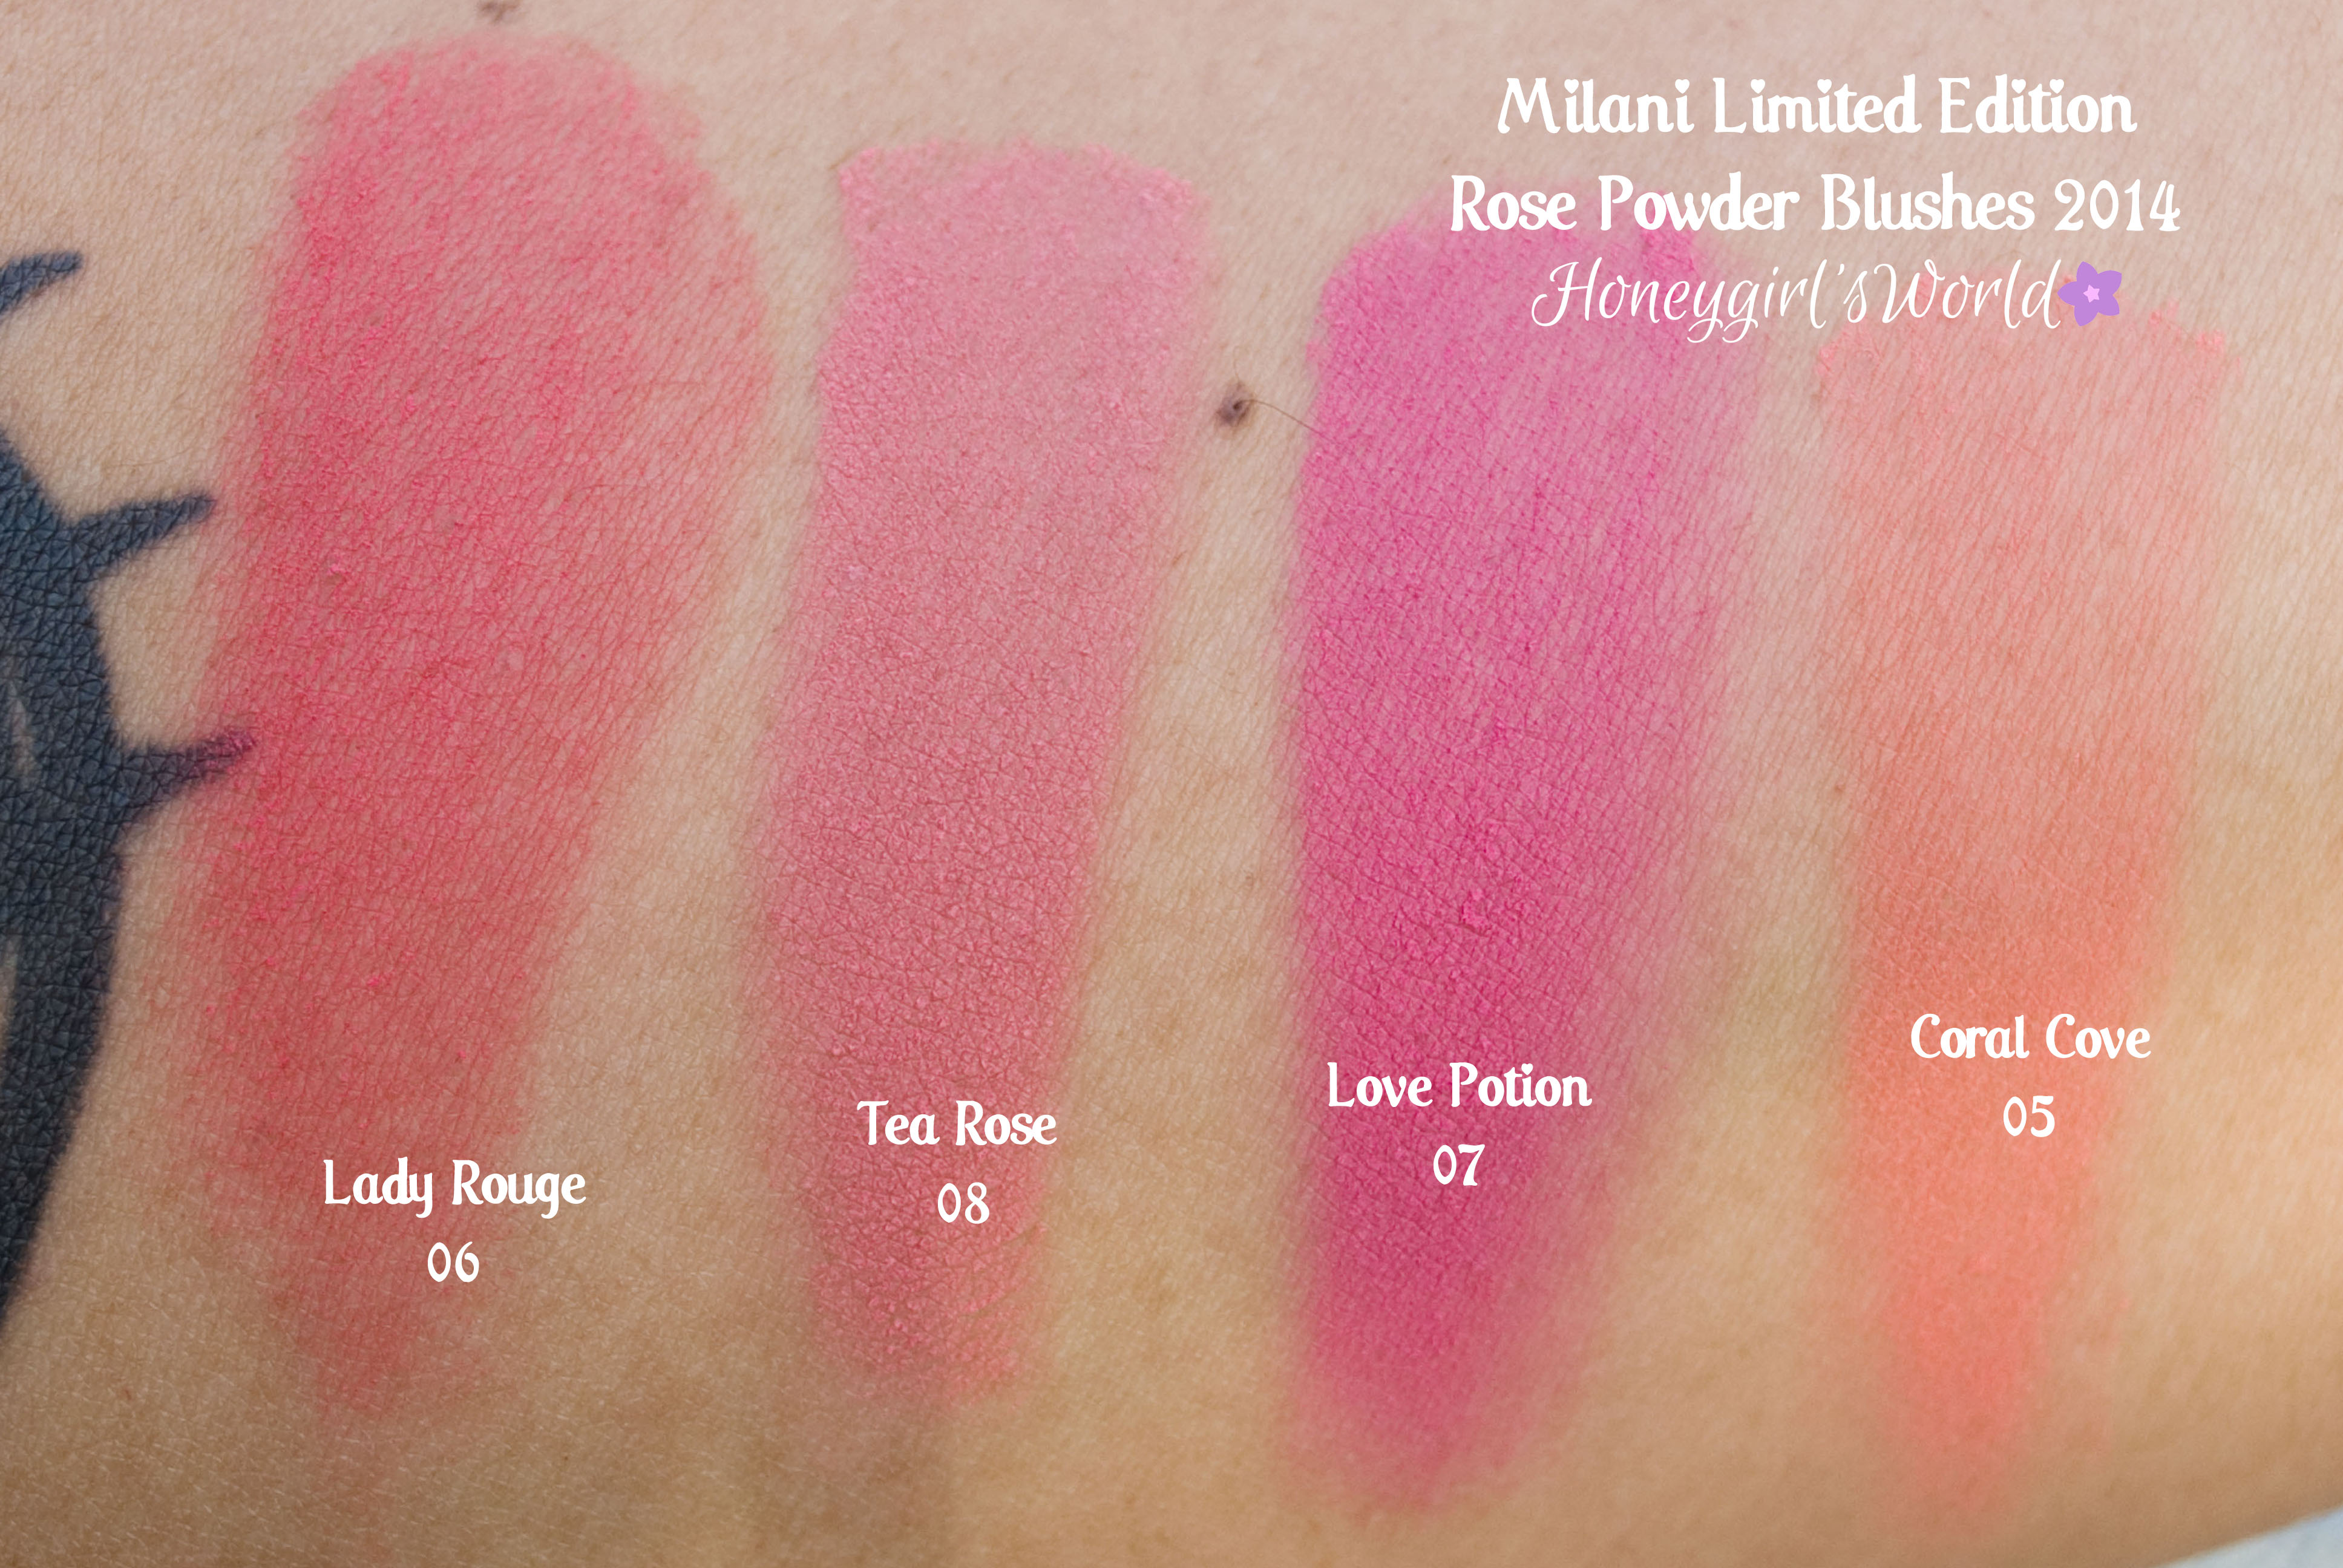
Blush – MAC Sunbasque

Highlight – Laura Geller Baked Highlighter Duo French Vanilla / Golden Rose

Lips – Milani Color Statement Lip Liner in Nude and Revlon Lip Butter in Pink Lemonade

Easy Smoky Eye using Tarte be MATTEnificent

I styled this look with a basic black top and a pair of khaki shorts (of course, not seen).  For my hair, I decided to leave it down and placed a cute daisy flower halo on my head.  I just love these halos/crowns… I love them for Spring.  The photo(s) below was taken using my phone (unedited / no filter).  I figured I would share that with you so you could see a photo of the look a little further away then the others.

Easy smoky eye look

I hope you guys enjoyed this week’s look.  I have so many ideas for Spring & Summer inspired makeup looks, so if I can find the time to create them for you or I’m heading out and want to rock them out – I’ll surely share them.  Thanks so much for reading (and watching).

Check out my last makeup look and tutorial here.

blog signature honey copy

March Ipsy Glam Bag - Destination Beauty

I have been subscribed to Ipsy now for about 3 years – since they were My Glam.  I took a break for about 6 months but have been really enjoyed the subscription now for the most part of the 3 years I have been signed up.  March’s Glam Bag is a very nice selection of products.  Included in this month’s bag I got the following items:

If you can’t see the video embedded above, check it out and watch it directly on YouTube here.  Don’t forget to Subscribe, Comment & Like! 😉

Ipsy provides you with 4-5 deluxe/sample size goodies in each bag and in some cases you also get a full sized item (or two or more) in your bag.  I have received products from brands like Urban Decay, bareMineral, Juice Beauty, NYX. Pixi Beauty and so much more.  I have also had the opportunity to try out new brands I have only heard of and never tried before.  Ipsy is just $10 a month (cancel anytime) and shipping is included.  It is the one sample subscription I have had the longest.  I used to be with Birchbox, Julep, NewBeauty Test Tube, Glossybox and BeautyFix (which is now Dermstore Beauty Fix) and I cancelled all but Ipsy.  I just like the goodies I get every month and for just $10 a month, it’s pretty worth it.  I can’t wait to do an eye look using the BoraBora palette.

Overall I’m very pleased with the products in this months bag.  Considering I got at least one full size product (Bora Bora Quad – $16.00) that already paid for the entire bag itself.  Ipsy bags can be a miss for me from time to time, but I am usually very pleased with what I receive each month.

Join me on ipsy and subscribe to the Glam Bag! You get 4-5 beauty products every month delivered to your door, for just $10. Michelle Phan curates the bags! Check it out here: http://www.ipsy.com/r/1o41

Do You have Ipsy?  What did you get this month?  I hope you enjoyed my March Ipsy Glam Bag Reveal for the Destination Beauty Glam Bag.

blog signature honey copy{Points Link included}


Last year, Milani rolled out 4 Limited Edition Rose Powder blushes (Coming Up Roses).  I was so excited about them, I asked my husband if I could get them and he ordered all 4 for me through Milani’s website – which sold out within 24 hours of it’s release online.  The Coming Up Roses collection included three matte blushes and one shimmer in gorgeous wearable shades.  It sold out instantly in Drug stores when it was released and I know many that wished they could get their hands on it before they were gone.  These blushes were some of my favorites for 2013 that it made my Best of Beauty products for the year.  Because I enjoyed them so much – I was completely ecstatic when I found out from Milani that they were releasing them again this year – but this time around, they had four new shades.Milani Rose Powder Blushes 2014This year’s new release includes four new shades that are matte.  These shades are a little more daring that those in last year’s collection and very pigmented.  The shades included:  05 Coral Cove, 06 Lady Rouge, 07 Love Potion, 08 Tea Rose.  They retail for $7.99 on Milanicosmetics.com and should be available at select Walgreens stores soon – if they are not available already.   Just like last year – this year’s collection includes 0.60 oz / 17g per blush, but unlike last year – all the shades are completely matte.

Check out my video review embedded below or watch it directly on YouTube here.

05 Coral Cove Milani Rose Blush

05 Coral Cove is a beautiful coral/orange shade that will be awesome for the Spring and Summer months for those beachy looks.  This blush is super pigmented, so a little goes a long way and you want to take your time building up the shade.  For those of you with medium / dark skin tones – I like that this shade will show up nicely and still provide a great punch of color.  If you have lighter skin tones – this will also make an awesome selection for you.

06 Lady Rouge Milani Rose Powder Blush06 Lady Rouge is a gorgeous deep shade.  I think if you are dark skinned or medium skin toned, this shade would be perfect for you.  It’s a reddish-orange with deep pigmentation.  A little goes a long way with this product and because it is so pigmented, if you are light skinned, I suggest that you use a stippling brush to apply.  Tap off the excess from your brush before swiping on your face and build up the color instead of applying a lot at one time.

07 Love Potion - Milani Rose Powder Blush07 Love Potion is probably one of the boldest shades out of the four.  This shade is a hot pink / almost magenta shade that reminds me of a pink fruit punch.  Like all the others – this blush is very pigmented and a little goes a long way.  For those of you that are medium / dark skin toned, this shade works really nicely and is very visible and gorgeous against deeper skin tones.  If you have lighter skin, this shade will be equally gorgeous, but be sure to take your time building up the color.

08 Tea Rose - Milani Rose Powder Blush08 Tea Rose is a beautiful rose hued pink and probably the most wearable out of the bunch.  Like the other three, it is super pigmented but definitely a blush I think anyone of any skin tone could add to their collection.  If you could only choose one out of the whole collection and are looking for a blush you want to be able to wear often, I think this would be the shade for you.

Swatches of the Milani Rose Powder Blushes 2014Overall – I think these blushes are gorgeous, but as I discuss in my video here, they can be a bit patchy to work with.  After using them a few times (like last year’s edition) the patchy problem is not prominent but it is something you may have to work on at first.  While each color is super pigmented as you can see from the swatches, they can lend for a powdery consistency and will require you to blend out appropriately for the look you want to achieve.  I noticed that by using a stippling brush for application that it applied nicely and the color was distributed evenly.  Since there is that gorgeous rose embossing in the blush – I think some of that may be the reason for the patchy application.  It takes a little finesse and if you are willing to take the time, I think it would be well worth it.  If you are interested in these simply for collecting, I know they will be an awesome addition to your collection – but I use my blushes from last year often, so after using them a while – I’m sure they will become favorites.

I hope you enjoyed my video – Please Subscribe, Comment and Like if you did.

I did rate them a 3.8 – 4.0 on the Sparkle Scale.  That is a fairly medium rating considering I do love them a lot.  The reasoning behind that is because as I mentioned, I love them and don’t mind the work of building up the color slowly for the proper color payoff or taking my time to deal with the patchy color you can get when you first start using the blushes.  Those are things I will easily get past and I’m not worried about them.  However, you are only able to pick up one type of blush, looking for great color pay off and don’t want the hassle, I suggest the new Milani Matte Baked Blushes.  I have a review on those which you can find here.  If you want to get at least one Rose Blush and looking for something wearable – Tea Rose would be an awesome choice.

Overall – I think that these are beautiful, a great statement to any collection and highly pigmented.  These blushes are still available at milanicosmetics.com – so check them out if you are interested or find them at select Walgreens stores in March.  Remember, these are Limited Edition – so once they sell out, they’re gone.

blog signature honey copy

{PR Sample}

I have had my Too Faced A Few Of My Favorite Things Palette now since Christmas.  I have used it a few times for soft everyday looks – but really wanted to create something that had a little bit of drama, but that was still wearable for someone who wanted to use it during the day or out and about.  This look utilizes some of my favorite colors in this palette and I love how easy the colors are to blend.  I named this look Honey Bella Rosa because my middle name is Rosa and the name of the Blush I chose is name Bella Rosa.  Since Bella Rosa means beautiful rose… I thought… “Honey Beautiful Rose” would be sweet.  Those that know me know that Lavender Sterling Roses are my favorite that my husband orders for me… and this look reminded me of these gorgeous roses.  I hope you enjoy the look! <3Honey Bella Rosa Makeup tutorial - Too Faced A Few of My Favorite Things

Check out the video embedded below for a step by step tutorial or click here to watch directly on YouTube.

Honey Bella Rosa Makeup Tutorial

Products used:

  • Eyeshadow Primer – Too Faced Shadow Insurance
  • Eyeshadow Base – NYX Shadow Base in Skintone (applied to the lid & lower lash line and stopping at the crease)
  • Eyeshadow Palette – Too Faced A Few of My Favorite things Palette (Limited Edition) Ooh la Orchid (crease and lower lash line), Honey Honey (lid), Chocolate Milk (blended above the crease as transition shade), Soiree (deepen the outer v), Pure Glam (deepen the outer v), Cream Colored Ponies (highlight), Moon on Their Wings (inner corner highlight / shimmer)
  • Brow Highlight – Milani Brow & Eye Highlight in Vanilla
  • Lower Lash Line pop of color – Jordana 12 Hour Made to last eye shadow pencil in Prolong Purple
  • Waterline & Tightline Liner – Mally Starlight Waterproof Liner in Midnight
  • Winged Liner – Kat Von D Tattoo Liner in Trooper
  • Mascara – Elizabeth Mott It’s So Big Volumizing Mascara layered with Benefit’s They’re Real Mascara
  • False Lashes – KISS 01
  • Contour – Starlook’s Cream Blush in Emphasize topped/set with Too Faced Chocolate Soleil Bronzer
  • Blush – Milani Baked Matte Bronzer in Bella Rosa
  • Highlight – Laura Geller’s Baked Blush & Brighten in Como
  • Lips – The Body Shop Lip Butter in Coconut (applied prior to doing the tutorial), Milani Color statement Lip liner in Nude topped with Milani Color statement lipstick in Nude Cream and NYX Butter Gloss in Angel Food Cake
  • Brows – Cailyn Gelux Brow in Cocoa set with NYX Brow set gel
  • Cupid’s Bow highlight – Benefit Wats Up

Note:  I always apply my lip butter or balm prior to doing the tutorial so that it moisturizes my lips before hand and my lipstick/gloss/liner application will go on smoothly.  Applying just before applying your lip products can cause your lips to be too slippery for your lip products to adhere and can cause movement or feathering.  If your lip balm/butter is still to slippery – blot your lips prior to applying your lipstick, etc.

As you see in the tutorial – I did not and do not use Face Primer or Foundation and concealer.  If I do use any of these products I’ll be sure to list them – but I have discontinued the use of these products since it has not been good for my sensitive skin.  I haven’t really used Foundation/Concealer in over 2 years.

Honey Bella Rosa - Makeup tutorial using Too Faced A Few of My Favorite Things palette


I hope you enjoyed this look.  As many of you know I love purple and I really wanted to finally do a tutorial using the Too Faced A Few Of My Favorite Things Palette – I’m glad I was finally able to create a look for you.

Honey Bella Rosa


Wishing you all a wonderful week!

xo

blog signature honey copy

Jennifer Lopez Same Girl Music Video Makeup

I have been a Jennifer Lopez fan for years… from way back in the day when she was a dancer on “In Living Color” (yes, I am that old… and no – you can’t laugh. lol)  Her style has always been one that I have admired and her makeup is always on point.  I have been on pins and needles wanting to do this look.  It was difficult to pull off because I chose the look in the video that you can’t see very well since it is covered under Jennifer’s hat, but I used her look as inspiration and added some extra color to it to create the look I have here.  She had sultry smoky eye that looked like it incorporated a taupe-silver shade.  Since I have been wanting to use my Urban Decay Naked 3 Palette in a tutorial – I chose to use a pink hue with a silver/taupe to create this look.  I am pretty happy with how it came out.

At the end of the day – even if I wanted to use her Makeup in the video as the base for my creation, I really wanted to concentrate on the message that the song portrayed.

Cause in the end, I’m still the SAME GIRL… I don’t owe nobody!

Jennifer Lopez Same Girl Makeup tutorial

Products used:

  • Eye Shadow Primer – Too Faced Shadow Insurance
  • Eye Shadow Base:  NYX Eyeshadow Base in Skintone
  • Eyeshadow transition shade: deep brown matte from Smashbox Full Exposure Palette
  • Eyeshadow Lid Shades: Urban Decay Naked 3 Palette (Liar on the inner half of the lid, Mugshot on the outer third of the lid, Blackheart smudged on the lower lash line and to deepen the crease and outer v, Strange used as the highlight and Trick used as the pop of color highlight in the inner corner)
  • Eyeshadow lid shades: TheBalm’s Nudetude Palette – Serious (matte black) used to deepen the outer v
  • Liner: Mally Evercolor Starlight Liner in Midnight – waterline/tightline and lower & upper lash line, Milani Liquif’eye Pencil liner in Black to intensify the liner look – applied to lower and upper lash line
  • Mascara: Perfekt Beauty Lash Perfection Gel applied to upper and lower lashes
  • Lashes: Kiss 01 False Lashes applied with Kiss Glue
  • Contour: Starlooks Cream Blush in Emphasize, NYC Sunny Bronzer and Laura Geller Bronze-n-Brighten in medium
  • Blush & Highlight: Milani Rose Blush in Warm Petals (powder blush) and Laura Geller Baked Highlighter Duo in French Vanilla/Golden Rose
  • Lips:  Milani Colorstatement liner in All Natural and Milani Colorstatement lipstick in Nude Creme

Just a quick note about foundation… I have been asked a few times about my foundation routine.  I haven’t used foundation in 2 years.  I have tried & used it a few times (maybe 3x) in the last 2 years as trials for companies – but I do not wear foundation or primer.  If I do use primer I use the following:  Laura Geller Spackle, Benefit Porefessional or I use my Mally Evercolor Pore Perfection compact to set my makeup.  However, I truly do not use face products like that often and it is rare.  I’ll be touching base on my skincare routine, etc. in the next month.  Stay tuned…

Jennifer Lopez Same Girl Makeup

When I had this look in mind, I wanted to make sure to create a look that would mimic JLo’s perfect bronzed and contour makeup that is always done so effortlessly.  I also loved the fact that she wore a New York Yankees hat (we are Yankees fans in our house), since she is a girl from the Bronx.  Since I am from Hawaii, I wanted to do something similar and rock out a “Maui Built” hat since I am from Maui.  I thought it was a cute interpretation. 🙂

Don’t forget to check out my tutorial for the look here – subscribe, comment and like if you enjoyed it! 😀

Jennifer Lopez Same Girl Makeup Tutorial

I haven’t been taking very good eye photos lately – but it’s because I just stopped doing them the last few months and I have been focusing more on my overall look.  I’ll be sure to get good ones in future looks, so you can see the detail in the eye makeup.

Jennifer Lopez Same Girl Music Video Makeup


I took the above photo about 6 hours later and wanted to show this look as well.  This photo was taken with Flash (since it was at night).  Most of my photos are taken during the day in natural lighting.

Jennifer Lopez Same Girl Makeup

I hope you all enjoyed this look!  Thank you so much to all of you for your support and love over the last few years through my journey here on my blog and on YouTube.  So many changes have happened over the last year and all for the positive.  So many awesome blessings have also come my way.  This makeup post marks more than just a look I was inspired by in a music video – but it also reminds me of this journey that I am on.  I’ve met so many people – some were awesome and positive influences, others were generating negativity that I had to turn my back on, but everything happens for a reason and I learned that I am a better person because of the experiences I have had.  Thank you to all – I look forward to bringing you more looks, inspiration, my life I love and so much more!

I’ma keep on growing
Keep on shining
Just wanna do me
I had to thank God ’cause he chose me

– Jennifer Lopez, Same Girl


blog signature honey copy